关键词:
新建一个Maven项目,最终项目结构如下: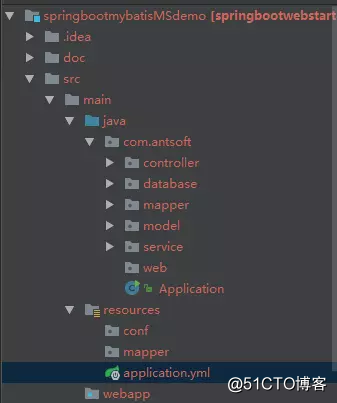
多数据源注入到sqlSessionFactory
POM增加如下依赖:
<!--JSON-->
        <dependency>
            <groupId>com.fasterxml.jackson.core</groupId>
            <artifactId>jackson-core</artifactId>
        </dependency>
        <dependency>
            <groupId>com.fasterxml.jackson.core</groupId>
            <artifactId>jackson-databind</artifactId>
        </dependency>
        <dependency>
            <groupId>com.fasterxml.jackson.datatype</groupId>
            <artifactId>jackson-datatype-joda</artifactId>
        </dependency>
        <dependency>
            <groupId>com.fasterxml.jackson.module</groupId>
            <artifactId>jackson-module-parameter-names</artifactId>
        </dependency>

        <dependency>
            <groupId>org.springframework.boot</groupId>
            <artifactId>spring-boot-starter-jdbc</artifactId>
        </dependency>
        <dependency>
            <groupId>mysql</groupId>
            <artifactId>mysql-connector-java</artifactId>
        </dependency>
        <dependency>
            <groupId>com.alibaba</groupId>
            <artifactId>druid</artifactId>
            <version>1.0.11</version>
        </dependency>
        <!--mybatis-->
        <dependency>
            <groupId>org.mybatis.spring.boot</groupId>
            <artifactId>mybatis-spring-boot-starter</artifactId>
            <version>1.1.1</version>
        </dependency>
        <!--mapper-->
        <dependency>
            <groupId>tk.mybatis</groupId>
            <artifactId>mapper-spring-boot-starter</artifactId>
            <version>1.1.0</version>
        </dependency>
        <!--pagehelper-->
        <dependency>
            <groupId>com.github.pagehelper</groupId>
            <artifactId>pagehelper-spring-boot-starter</artifactId>
            <version>1.1.0</version>
            <exclusions>
                <exclusion>
                    <artifactId>mybatis-spring-boot-starter</artifactId>
                    <groupId>org.mybatis.spring.boot</groupId>
                </exclusion>
            </exclusions>
        </dependency>
这里需要注意的是:项目是通过扩展mybatis-spring-boot-starter的org.mybatis.spring.boot.autoconfigure.MybatisAutoConfiguration来实现多数据源注入的。在mybatis-spring-boot-starter:1.2.0中,该类取消了默认构造函数,因此本项目依旧使用1.1.0版本。需要关注后续版本是否会重新把扩展开放处理。
之所以依旧使用旧方案,是我个人认为开放扩展是合理的,相信在未来的版本中会回归。
增加主从库配置(application.yml)
druid:
    type: com.alibaba.druid.pool.DruidDataSource
    master:
        url: jdbc:mysql://192.168.249.128:3307/db-test?characterEncoding=UTF-8&autoReconnect=true&zeroDateTimeBehavior=convertToNull&useUnicode=true
        driver-class-name: com.mysql.jdbc.Driver
        username: root
        password: root
        initial-size: 5
        min-idle: 1
        max-active: 100
        test-on-borrow: true
    slave:
        url: jdbc:mysql://192.168.249.128:3317/db-test?characterEncoding=UTF-8&autoReconnect=true&zeroDateTimeBehavior=convertToNull&useUnicode=true&characterEncoding=utf-8
        driver-class-name: com.mysql.jdbc.Driver
        username: root
        password: root
        initial-size: 5
        min-idle: 1
        max-active: 100
        test-on-borrow: true
创建数据源
@Configuration
@EnableTransactionManagement
public class DataSourceConfiguration {

    @Value("${druid.type}")
    private Class<? extends DataSource> dataSourceType;

    @Bean(name = "masterDataSource")
    @Primary
    @ConfigurationProperties(prefix = "druid.master")
    public DataSource masterDataSource(){
        return DataSourceBuilder.create().type(dataSourceType).build();
    }

    @Bean(name = "slaveDataSource")
    @ConfigurationProperties(prefix = "druid.slave")
    public DataSource slaveDataSource1(){
        return DataSourceBuilder.create().type(dataSourceType).build();
    }
}
将多数据源注入到sqlSessionFactory中
前面提到了这里通过扩展mybatis-spring-boot-starter的org.mybatis.spring.boot.autoconfigure.MybatisAutoConfiguration来实现多数据源注入的
@Configuration
@AutoConfigureAfter({DataSourceConfiguration.class})
public class MybatisConfiguration extends MybatisAutoConfiguration {

    private static Log logger = LogFactory.getLog(MybatisConfiguration.class);

    @Resource(name = "masterDataSource")
    private DataSource masterDataSource;
    @Resource(name = "slaveDataSource")
    private DataSource slaveDataSource;

    @Bean
    public SqlSessionFactory sqlSessionFactory() throws Exception {
        return super.sqlSessionFactory(roundRobinDataSouceProxy());
    }

    public AbstractRoutingDataSource roundRobinDataSouceProxy(){
        ReadWriteSplitRoutingDataSource proxy = new ReadWriteSplitRoutingDataSource();
        Map<Object,Object> targetDataResources = new ClassLoaderRepository.SoftHashMap();
        targetDataResources.put(DbContextHolder.DbType.MASTER,masterDataSource);
        targetDataResources.put(DbContextHolder.DbType.SLAVE,slaveDataSource);
        proxy.setDefaultTargetDataSource(masterDataSource);//默认源
        proxy.setTargetDataSources(targetDataResources);
        return proxy;
    }
}
实现读写分离(多数据源分离)
这里主要思路如下:
1-将不同的数据源标识记录在ThreadLocal中
2-通过注解标识出当前的service方法使用哪个库
3-通过Spring AOP实现拦截注解并注入不同的标识到threadlocal中
4-获取源的时候通过threadlocal中不同的标识给出不同的sqlSession
标识存放ThreadLocal的实现
public class DbContextHolder {

    public enum DbType{
        MASTER,SLAVE
    }

    private static final ThreadLocal<DbType> contextHolder = new ThreadLocal<>();

    public static void setDbType(DbType dbType){
        if(dbType==null)throw new NullPointerException();
        contextHolder.set(dbType);
    }

    public static DbType getDbType(){
        return contextHolder.get()==null?DbType.MASTER:contextHolder.get();
    }

    public static void clearDbType(){
        contextHolder.remove();
    }

}
注解实现
/**
 * 该注解注释在service方法上,标注为链接slaves库
 * Created by Jason on 2017/3/6.
 */
@Target({ElementType.METHOD,ElementType.TYPE})
@Retention(RetentionPolicy.RUNTIME)
public @interface ReadOnlyConnection {
}
Spring AOP对注解的拦截
@Aspect
@Component
public class ReadOnlyConnectionInterceptor implements Ordered {

    public static final Logger logger = LoggerFactory.getLogger(ReadOnlyConnectionInterceptor.class);

    @Around("@annotation(readOnlyConnection)")
    public Object proceed(ProceedingJoinPoint proceedingJoinPoint,ReadOnlyConnection readOnlyConnection) throws Throwable {
        try {
            logger.info("set database connection to read only");
            DbContextHolder.setDbType(DbContextHolder.DbType.SLAVE);
            Object result = proceedingJoinPoint.proceed();
            return result;
        }finally {
            DbContextHolder.clearDbType();
            logger.info("restore database connection");
        }
    }

    @Override
    public int getOrder() {
        return 0;
    }
}
根据标识获取不同源
这里我们通过扩展AbstractRoutingDataSource来获取不同的源。它是Spring提供的一个可以根据用户发起的不同请求去转换不同的数据源,比如根据用户的不同地区语言选择不同的数据库。通过查看源码可以发现,它是通过determineCurrentLookupKey()返回的不同key到sqlSessionFactory中获取不同源(前面已经展示了如何在sqlSessionFactory中注入多个源)
public class ReadWriteSplitRoutingDataSource extends AbstractRoutingDataSource {

    @Override
    protected Object determineCurrentLookupKey() {
        return DbContextHolder.getDbType();
    }
}
以上就完成了读写分离(多数据源)的配置方案。下面是一个具体的实例
使用方式
Entity
@Table(name = "t_sys_dic_type")
public class DicType extends BaseEntity{

    String code;

    String name;

    Integer status;

    ...
}
Mapper
public interface DicTypeMapper extends BaseMapper<DicType> {
}
Service
@Service
public class DicTypeService {
    @Autowired
    private DicTypeMapper dicTypeMapper;

    @ReadOnlyConnection
    public List<DicType> getAll(DicType dicType){
        if (dicType.getPage() != null && dicType.getRows() != null) {
            PageHelper.startPage(dicType.getPage(), dicType.getRows());
        }
        return dicTypeMapper.selectAll();
    }

}
注意这里的@ReadOnlyConnection注解
Controller
@RestController
@RequestMapping("/dictype")
public class DicTypeController {
    @Autowired
    private DicTypeService dicTypeService;

    @RequestMapping(value = "/all")
    public PageInfo<DicType> getALL(DicType dicType){
        List<DicType> dicTypeList = dicTypeService.getAll(dicType);
        return new PageInfo<>(dicTypeList);
    }
}
通过mvn spring-boot:run启动后
后台打印出
c.a.d.m.ReadOnlyConnectionInterceptor : set database connection to read only
说明使用了从库的链接获取数据
备注:如何保证多源事务呢?br/>1-在读写分离场景中不会考虑主从库事务,在纯读的上下文上使用@ReadOnlyConnection标签。其他则默认使用主库。
2-在多源场景中,Spring的@Transaction是可以保证多源的各自事务性的。
springboot集成redis并实现主从架构(代码片段)
...会写bug的程序猿!今天这篇文章来和大家分享一下在springboot中如何集成redis,并实现主从架构,进行数据的简单存储。我的Redis是部署在Windows系统下面的,所以在这里附上Redis在Windows环境下的安装地址和安装说明... 查看详情
springboot+mybatis集成搭建
本博客介绍一下SpringBoot集成Mybatis,数据库连接池使用alibaba的druid,使用SpringBoot微框架虽然集成Mybatis之后可以不使用xml的方式来写sql,但是用惯了xml的其实也可以用xml来实现的,实现上具体用什么方式并不重要,主要是搭建一... 查看详情
springboot+mybatis实现数据库读写分离
本文不包含数据库主从配置。实现思路:在项目中配置多数据源,通过代码控制访问哪一个数据源。spring-jdbc为我们提供了AbstractRoutingDataSource,DataSource的抽象实现,基于查找键,返回不通不同的数据源。编写我们自己的动态数... 查看详情
mybatis(springboot集成mybatis,拦截器实现动态sql)
...我们这个项目中是如何对mybatis动态生成sql进行改进的吧springboot在配置了MapperScan之后会自动扫描相关的包,并对有@Mapper标记的类进行注册@Configuration@EnableAutoConfiguration@ServletComponentScan@ComponentScan("xxxx.scm","xxxxx.base")@M 查看详情
springboot集成mybatis以及自动化测试代码实现
Mybatis和logback的应用配置1、在module的pom.xml文件中,加载springboot和swagger、lombok、fastjson、mysql、mybatis包2、在resources中添加配置:配置文件有两种,一种是properties,另一种是yaml,这里使用yamlyaml配置与properties一样,只是格式不同... 查看详情
springboot通过xml集成mybatis实现mysql数据库操作探坑记
这里主要是介绍在springboot里面通过xml的方式进行配置,因为xml的配置相对后台复杂的系统来说,能够使得系统的配置和逻辑实现分离,避免配置和代码逻辑过度耦合,xml的配置模式能够最大限度的实现配置集中,和java代码逻辑... 查看详情
四集成专业应用,实现对消费者的连接洞察与服务java版springcloud+springboot+mybatis+uniappb2b2c多商户入驻商城直播电子商务
...;、微服务平台(业务服务)2.核心架构SpringCloud、SpringBoot、Mybatis、Redis3.前端框架VUE、Uniapp、ElementUI、H5/CSS3、IOS、A 查看详情
springboot系列教程七:springboot集成mybatis
一.创建项目 项目名称为“springboot_mybatis_demo”,创建过程中勾选“Web”,“MyBatis”,“MySQL”,第一次创建Maven需要下载依赖包(耐心等待) 二.实现2.1创建User类1packagecom.woniu.bean;234publicclassUser{5pr... 查看详情
springboot集成mybatis及通用mapper
集成Mybatis可以通过 mybatis-spring-boot-starter实现。<!--https://mvnrepository.com/artifact/org.mybatis.spring.boot/mybatis-spring-boot-starter--><dependency><groupId>org.mybatis.spring. 查看详情
springboot(2.1.9.release)集成mybatis
这篇文章主要讲解SpringBoot集成MyBatis实现一个最基本的增删改查功能,并连接访问数据库。整合之前你需要随便准备一个数据表就行。SpringBoot集成MyBatis非常简单,不需要Spring繁琐的配置,也不需要配置类就能够快速集成。&n... 查看详情
springboot集成mybatis时批量插入
通过注解的形式实现数据库的批量插入/***@authorHolley*@Description请输入一句话进行描述*@create2018-07-1612:09**/@Component@MapperpublicinterfaceTagOfPatientDao{@InsertProvider(type=TagOfPatientProvider.class,method="insertAll")vo 查看详情
springboot介绍
SpringBoot集成教程SpringBoot介绍SpringBoot开发环境搭建(Eclipse)SpringBootHelloWorld(restful接口)例子springboot连接Mysqlspringboot配置druid连接池连接mysqlspringboot集成mybatis(1)springboot集成mybatis(2)–使用pagehelper实现分页springboot集 查看详情
详解springboot集成mybatis(代码片段)
在下文中详细叙述了SpringBoot集成Mybatis过程,在实现实验的基础上有些步骤可以进一步简化,加速开发过程。1、lombok插件使用https://blog.csdn.net/daniaoxp/article/details/119381941在第5步骤中新建了Student类,设置了id,name&#x... 查看详情
第九章springboot+mybatis+多数据源(aop实现)
在第八章springboot+mybatis+多数据源代码的基础上,做两点修改1、ShopDaopackagecom.xxx.firstboot.dao;importorg.springframework.beans.factory.annotation.Autowired;importorg.springframework.stereotype.Repository;importcom.xxx. 查看详情
springboot+mybatis+pagehelper配置多数据源
前言:本文为springboot结合mybatis配置多数据源,在项目当中很多情况是使用主从数据源来读写分离,还有就是操作多库,本文介绍如何一个项目同时使用2个数据源。也希望大家带着思考去学习!博主是最近才学的配置写成博... 查看详情
springbootredis缓存(cache)集成
SpringBoot集成教程SpringBoot介绍SpringBoot开发环境搭建(Eclipse)SpringBootHelloWorld(restful接口)例子springboot连接Mysqlspringboot配置druid连接池连接mysqlspringboot集成mybatis(1)springboot集成mybatis(2)–使用pagehelper实现分页springboot集 查看详情
springboot+mybatis+多数据源入门搭建+跨域集成以及过滤器配置的方式和过滤器加载顺序控制(代码片段)
Springboot+mybatis+多数据源入门搭建+跨域集成以及过滤器配置的方式和过滤器加载顺序控制由于项目需要,最近研究了一下springboot的项目搭建,下面和大家说说项目搭建的心得体会开发环境: JDK1.8 ... 查看详情
第九章springboot+mybatis+多数据源(aop实现)(转载)
本编博客转发自:http://www.cnblogs.com/java-zhao/p/5415896.html 1、ShopDaopackagecom.xxx.firstboot.dao;importorg.springframework.beans.factory.annotation.Autowired;importorg.springframework.stereotype.Rep 查看详情