关键词:
最近测试了RedHat 6.5上RHCS,搭建了一个双机HA群集,在此将配置过程和测试过程分享给大家,主要包括节点配置、群集管理服务器配置、群集创建与配置、群集测试等内容。
一、测试环境
计算机名 | 操作系统 | IP地址 | 群集IP | 安装的软件包 |
HAmanager | RedHat 6.5 | 192.168.10.150 | - | luci、iscsi target(用于仲裁盘) |
node1 | RedHat 6.5 | 192.168.10.104 | 192.168.10.103 | High Availability、httpd |
node2 | RedHat 6.5 | 192.168.10.105 | High Availability、httpd |
二、节点配置
1、在三台机分别配置hosts互相解析
[[email protected] ~]# cat /etc/hosts
192.168.10.104 node1 node1.localdomain
192.168.10.105 node2 node2.localdomain
192.168.10.150 HAmanager HAmanager.localdomain
[[email protected] ~]# cat /etc/hosts
192.168.10.104 node1 node1.localdomain
192.168.10.105 node2 node2.localdomain
192.168.10.150 HAmanager HAmanager.localdomain
[[email protected] ~]# cat /etc/hosts
192.168.10.104 node1 node1.localdomain
192.168.10.105 node2 node2.localdomain
192.168.10.150 HAmanager HAmanager.localdomain
2、在三台机分别配置SSH互信
[[email protected] ~]# ssh-keygen -t rsa
[[email protected] ~]# ssh-copy-id -i node1
[[email protected] ~]# ssh-keygen -t rsa
[[email protected] ~]# ssh-copy-id -i node2
[[email protected] ~]# ssh-keygen -t rsa
[[email protected] ~]# ssh-copy-id -i node1
3、两个节点关闭NetworkManager和acpid服务
[[email protected] ~]# service NetworkManager stop
[[email protected] ~]# chkconfig NetworkManager off
[[email protected] ~]# service acpid stop
[[email protected] ~]# chkconfig acpid off
[[email protected] ~]# service NetworkManager stop
[[email protected] ~]# chkconfig NetworkManager off
[[email protected] ~]# service acpid stop
[[email protected] ~]# chkconfig acpid off
4、两个节点配置本地yum源
[[email protected] ~]# cat/etc/yum.repos.d/rhel6.5.repo
[Server]
name=base
baseurl=file:///mnt/
enabled=1
gpgcheck=0
[HighAvailability]
name=base
baseurl=file:///mnt/HighAvailability
enabled=1
gpgcheck=0
[[email protected] ~]# cat/etc/yum.repos.d/rhel6.5.repo
[Server]
name=base
baseurl=file:///mnt/
enabled=1
gpgcheck=0
[HighAvailability]
name=base
baseurl=file:///mnt/HighAvailability
enabled=1
gpgcheck=0
5、两个节点分别安装群集软件包
[[email protected] ~]# yum groupinstall ‘High Availability‘ –y
Installed:
ccs.x86_64 0:0.16.2-69.el6 cman.x86_640:3.0.12.1-59.el6
omping.x86_64 0:0.0.4-1.el6 rgmanager.x86_640:3.0.12.1-19.el6
Dependency Installed:
cifs-utils.x86_640:4.8.1-19.el6 clusterlib.x86_64 0:3.0.12.1-59.el6
corosync.x86_640:1.4.1-17.el6 corosynclib.x86_64 0:1.4.1-17.el6
cyrus-sasl-md5.x86_640:2.1.23-13.el6_3.1 fence-agents.x86_64 0:3.1.5-35.el6
fence-virt.x86_640:0.2.3-15.el6 gnutls-utils.x86_64 0:2.8.5-10.el6_4.2
ipmitool.x86_64 0:1.8.11-16.el6 keyutils.x86_640:1.4-4.el6
libevent.x86_640:1.4.13-4.el6 libgssglue.x86_64 0:0.1-11.el6
libibverbs.x86_640:1.1.7-1.el6 librdmacm.x86_64 0:1.0.17-1.el6
libtirpc.x86_640:0.2.1-6.el6_4 libvirt-client.x86_64 0:0.10.2-29.el6
lm_sensors-libs.x86_640:3.1.1-17.el6 modcluster.x86_640:0.16.2-28.el6
nc.x86_64 0:1.84-22.el6 net-snmp-libs.x86_64 1:5.5-49.el6
net-snmp-utils.x86_641:5.5-49.el6 nfs-utils.x86_641:1.2.3-39.el6
nfs-utils-lib.x86_640:1.1.5-6.el6 numactl.x86_640:2.0.7-8.el6
oddjob.x86_64 0:0.30-5.el6 openais.x86_64 0:1.1.1-7.el6
openaislib.x86_640:1.1.1-7.el6 perl-Net-Telnet.noarch 0:3.03-11.el6
pexpect.noarch 0:2.3-6.el6 python-suds.noarch0:0.4.1-3.el6
quota.x86_64 1:3.17-20.el6 resource-agents.x86_640:3.9.2-40.el6
ricci.x86_64 0:0.16.2-69.el6 rpcbind.x86_640:0.2.0-11.el6
sg3_utils.x86_64 0:1.28-5.el6 tcp_wrappers.x86_640:7.6-57.el6
telnet.x86_64 1:0.17-47.el6_3.1 yajl.x86_64 0:1.0.7-3.el6
Complete!
6、两个节点分别启动群集服务
[[email protected] ~]# service ricci start
[[email protected] ~]# chkconfig ricci on
[[email protected] ~]# chkconfig cman on
[[email protected] ~]# chkconfig rgmanager on
[[email protected] ~]# service ricci start
[[email protected] ~]# chkconfig ricci on
[[email protected] ~]# chkconfig cman on
[[email protected] ~]# chkconfig rgmanager on
7、两个节点分别配置ricci密码
[[email protected] ~]# passwd ricci
New password:
BAD PASSWORD: it is too short
BAD PASSWORD: is too simple
Retype new password:
passwd: all authentication tokens updated successfully.
[[email protected] ~]# passwd ricci
New password:
BAD PASSWORD: it is too short
BAD PASSWORD: is too simple
Retype new password:
passwd: all authentication tokens updated successfully.
8、两个节点分别安装httpd服务,方便后面测试应用的高可用性
[[email protected] ~]# yum -y install httpd
[[email protected] ~]# echo "This is Node1" > /var/www/html/index.html
[[email protected] ~]# yum -y install httpd
[[email protected] ~]# echo "This is Node2" > /var/www/html/index.html
二、群集管理服务器配置
1、在群集管理服务器安装luci软件包
[[email protected] ~]#yum -y install luci
Installed:
luci.x86_64 0:0.26.0-48.el6
Dependency Installed:
TurboGears2.noarch 0:2.0.3-4.el6
python-babel.noarch 0:0.9.4-5.1.el6
python-beaker.noarch 0:1.3.1-7.el6
python-cheetah.x86_64 0:2.4.1-1.el6
python-decorator.noarch 0:3.0.1-3.1.el6
python-decoratortools.noarch 0:1.7-4.1.el6
python-formencode.noarch 0:1.2.2-2.1.el6
python-genshi.x86_64 0:0.5.1-7.1.el6
python-mako.noarch 0:0.3.4-1.el6
python-markdown.noarch 0:2.0.1-3.1.el6
python-markupsafe.x86_64 0:0.9.2-4.el6
python-myghty.noarch 0:1.1-11.el6
python-nose.noarch 0:0.10.4-3.1.el6
python-paste.noarch 0:1.7.4-2.el6
python-paste-deploy.noarch 0:1.3.3-2.1.el6
python-paste-script.noarch 0:1.7.3-5.el6_3
python-peak-rules.noarch 0:0.5a1.dev-9.2582.1.el6
python-peak-util-addons.noarch 0:0.6-4.1.el6
python-peak-util-assembler.noarch 0:0.5.1-1.el6
python-peak-util-extremes.noarch 0:1.1-4.1.el6
python-peak-util-symbols.noarch 0:1.0-4.1.el6
python-prioritized-methods.noarch 0:0.2.1-5.1.el6
python-pygments.noarch 0:1.1.1-1.el6
python-pylons.noarch 0:0.9.7-2.el6
python-repoze-tm2.noarch 0:1.0-0.5.a4.el6
python-repoze-what.noarch 0:1.0.8-6.el6
python-repoze-what-pylons.noarch 0:1.0-4.el6
python-repoze-who.noarch 0:1.0.18-1.el6
python-repoze-who-friendlyform.noarch 0:1.0-0.3.b3.el6
python-repoze-who-testutil.noarch 0:1.0-0.4.rc1.el6
python-routes.noarch 0:1.10.3-2.el6
python-setuptools.noarch 0:0.6.10-3.el6
python-sqlalchemy.noarch 0:0.5.5-3.el6_2
python-tempita.noarch 0:0.4-2.el6
python-toscawidgets.noarch 0:0.9.8-1.el6
python-transaction.noarch 0:1.0.1-1.el6
python-turbojson.noarch 0:1.2.1-8.1.el6
python-weberror.noarch 0:0.10.2-2.el6
python-webflash.noarch 0:0.1-0.2.a9.el6
python-webhelpers.noarch 0:0.6.4-4.el6
python-webob.noarch 0:0.9.6.1-3.el6
python-webtest.noarch 0:1.2-2.el6
python-zope-filesystem.x86_64 0:1-5.el6
python-zope-interface.x86_64 0:3.5.2-2.1.el6
python-zope-sqlalchemy.noarch 0:0.4-3.el6
Complete!
[[email protected] ~]#
2、启动luci服务
[[email protected] ~]# service luci start
Adding following auto-detected host IDs (IP addresses/domain names), corresponding to `HAmanager.localdomain‘ address, to the configuration of self-managed certificate `/var/lib/luci/etc/cacert.config‘ (you can change them by editing `/var/lib/luci/etc/cacert.config‘, removing the generated certificate `/var/lib/luci/certs/host.pem‘ and restarting luci):
(none suitable found, you can still do it manually as mentioned above)
Generating a 2048 bit RSA private key
writing new private key to ‘/var/lib/luci/certs/host.pem‘
Starting saslauthd: [ OK ]
Start luci...
Point your web browser to https://HAmanager.localdomain:8084 (or equivalent) to access luci
[[email protected] ~]# chkconfig luci on
江健龙的技术博客http://jiangjianlong.blog.51cto.com/3735273/1931499
三、创建和配置群集
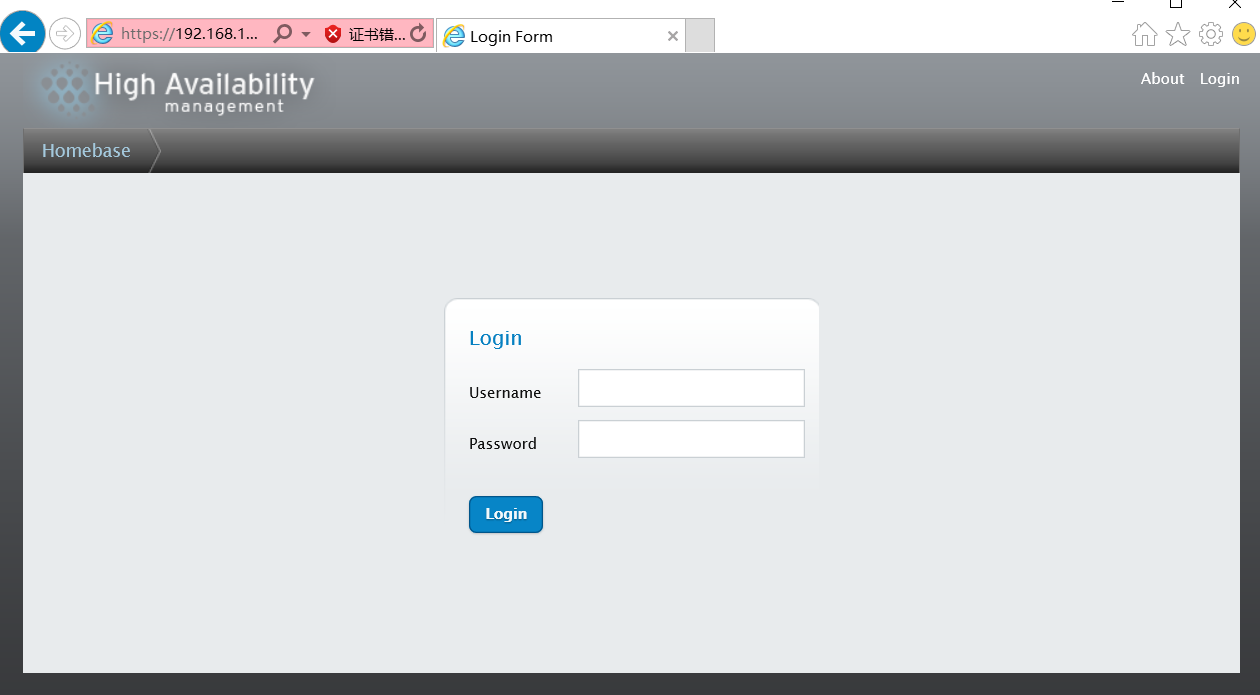
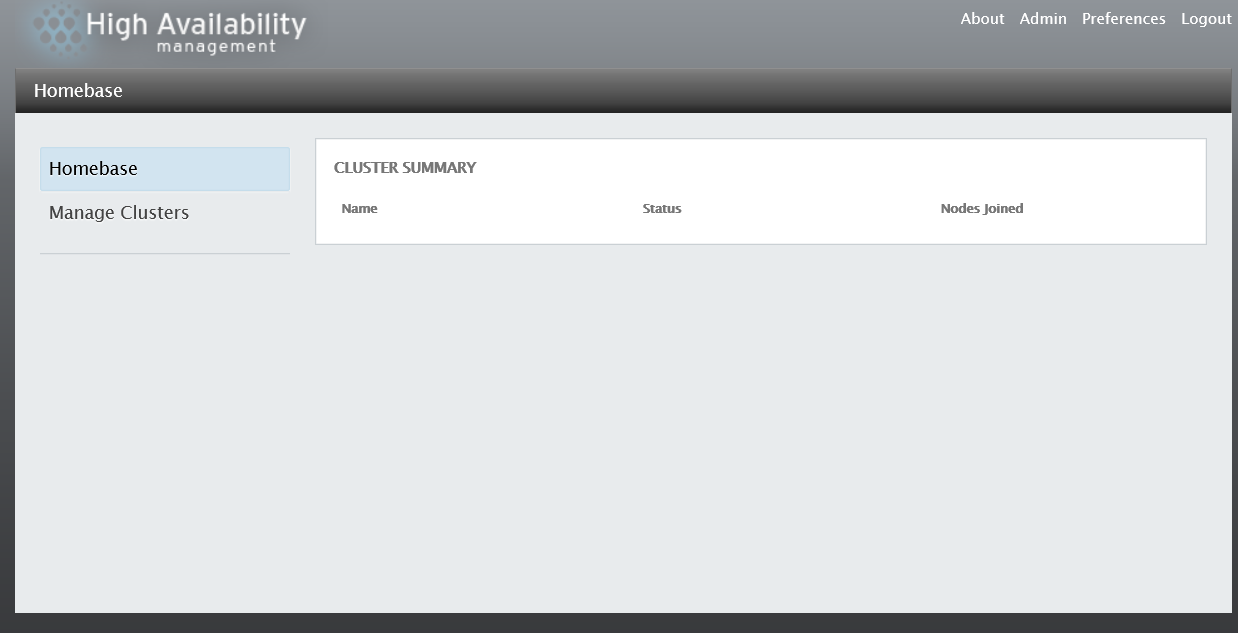
1、使用浏览器访问HA的web管理界面https://192.168.10.150:8084
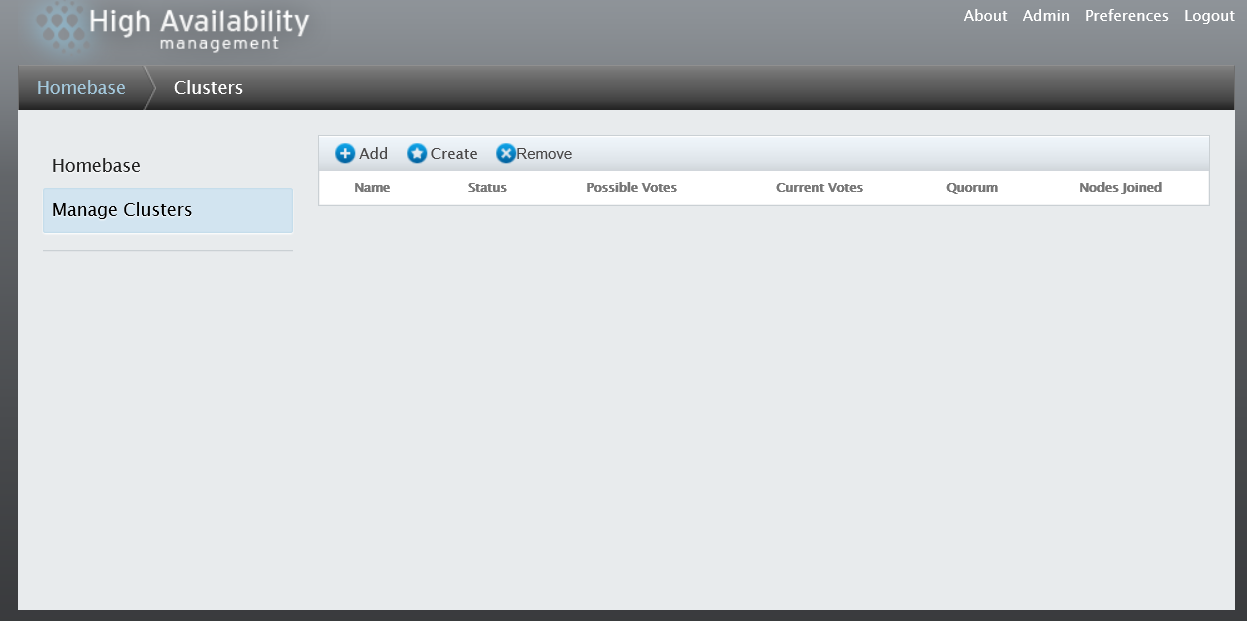
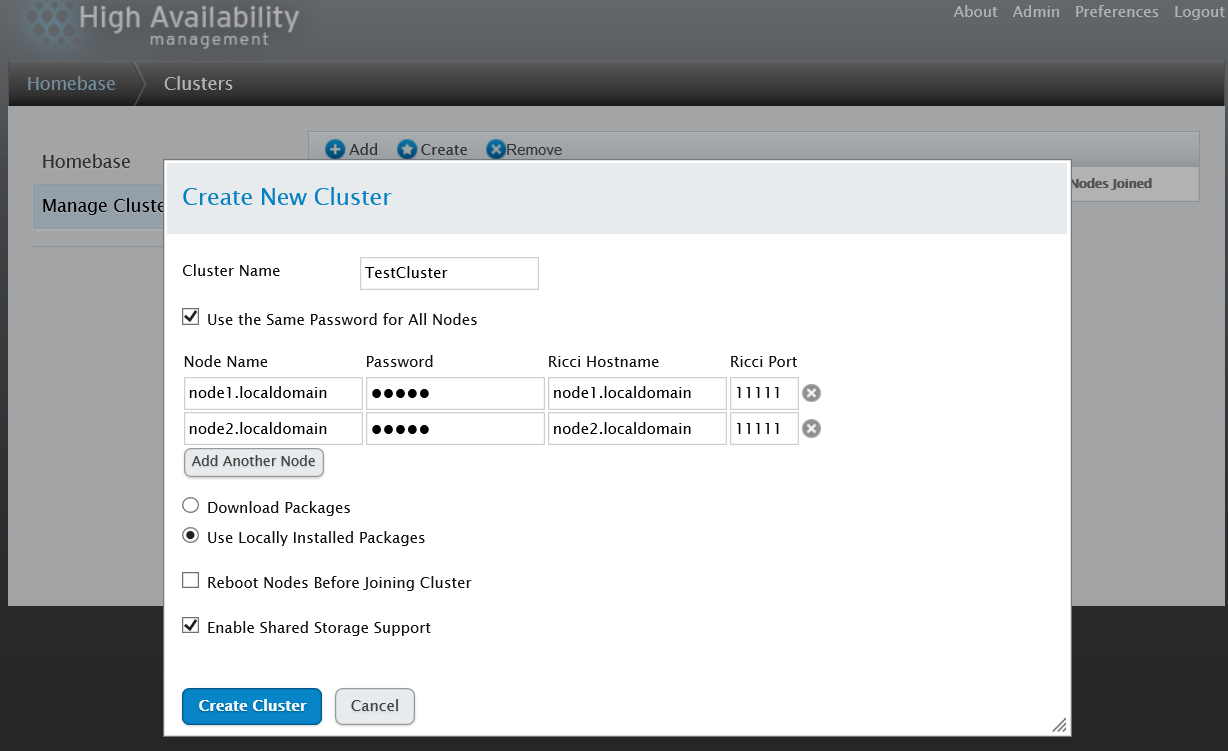
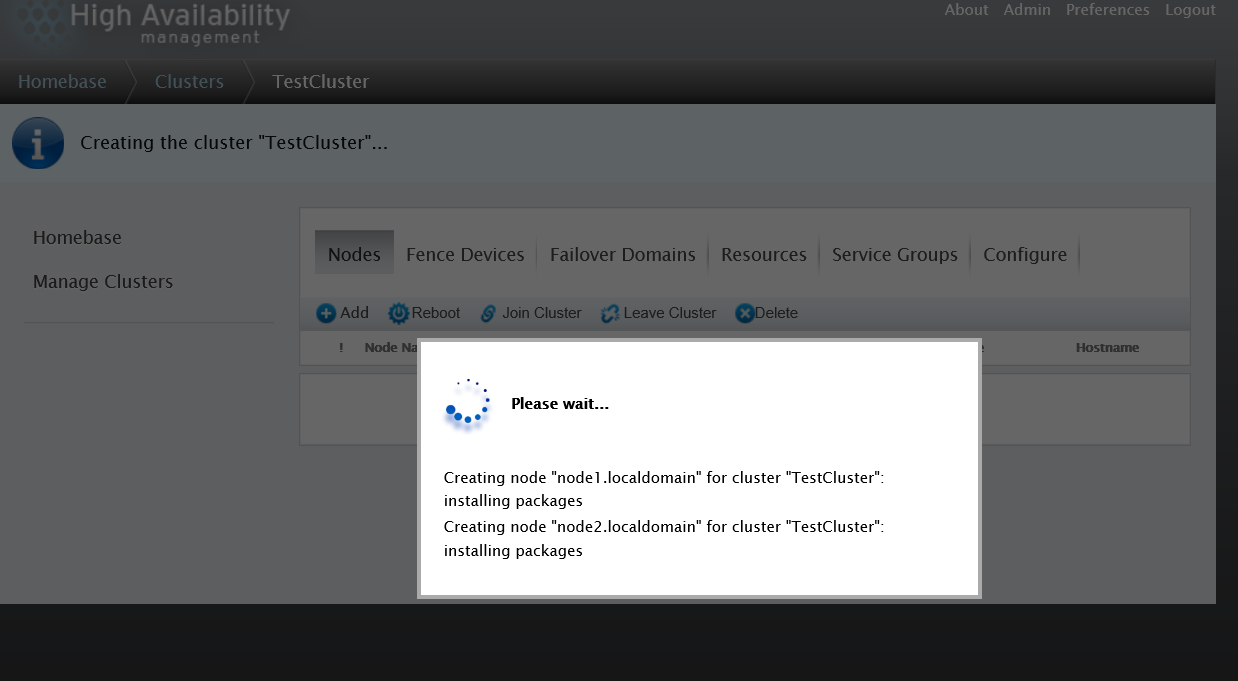
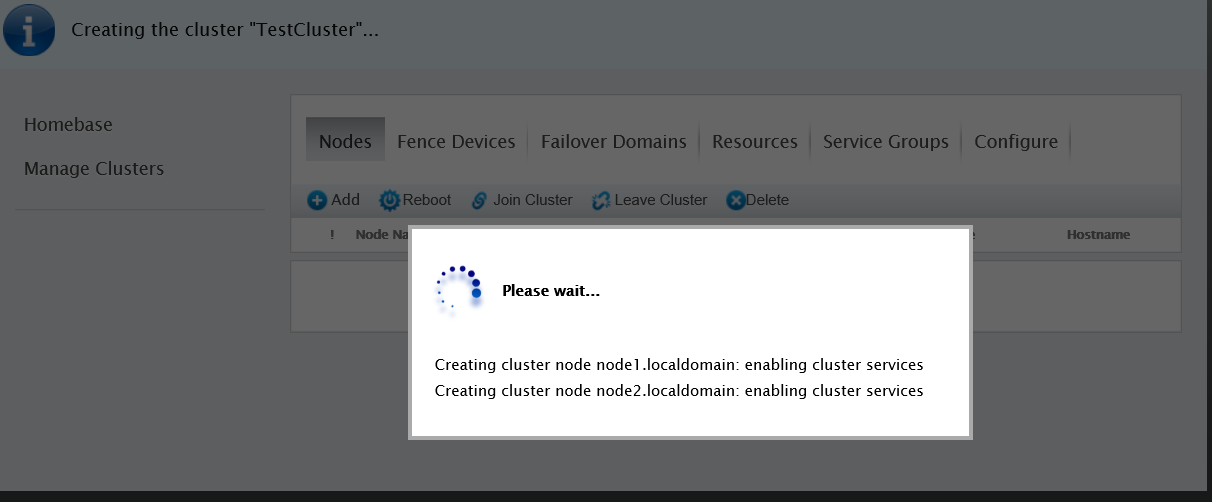
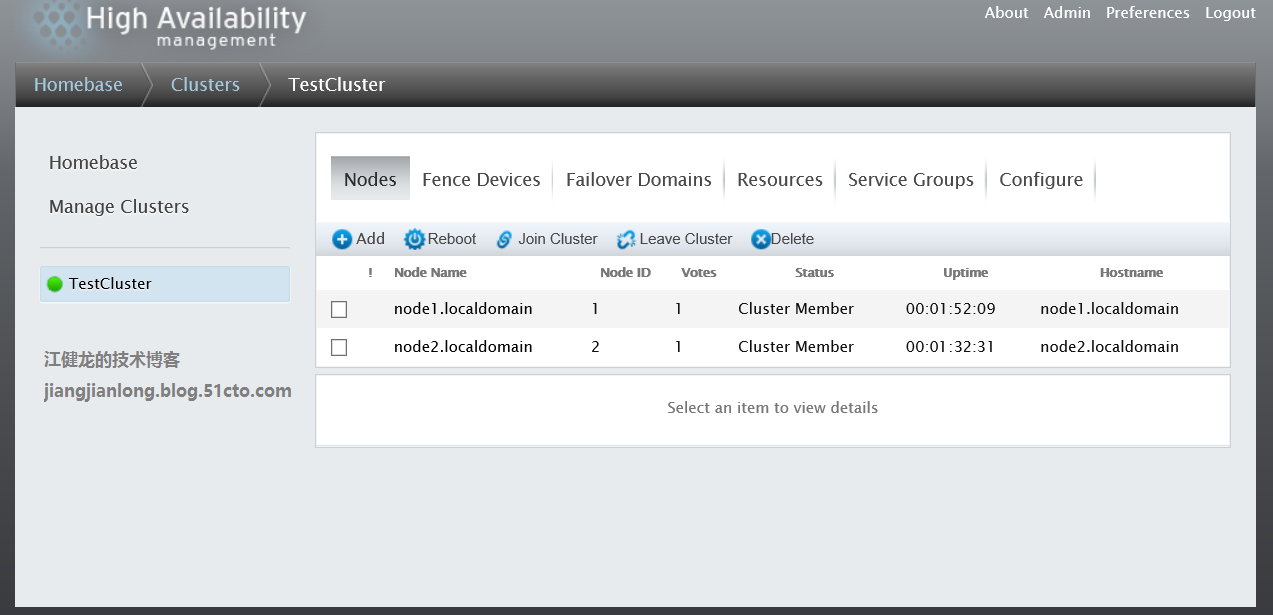
2、创建群集并添加节点至群集中
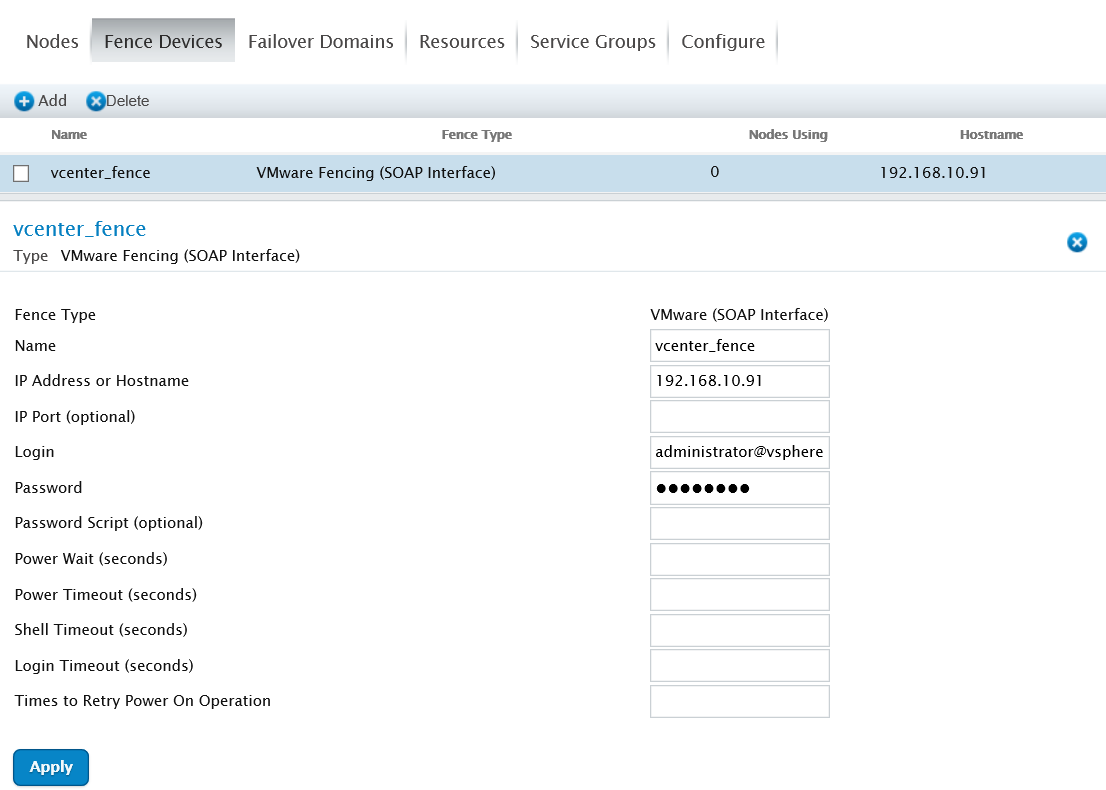
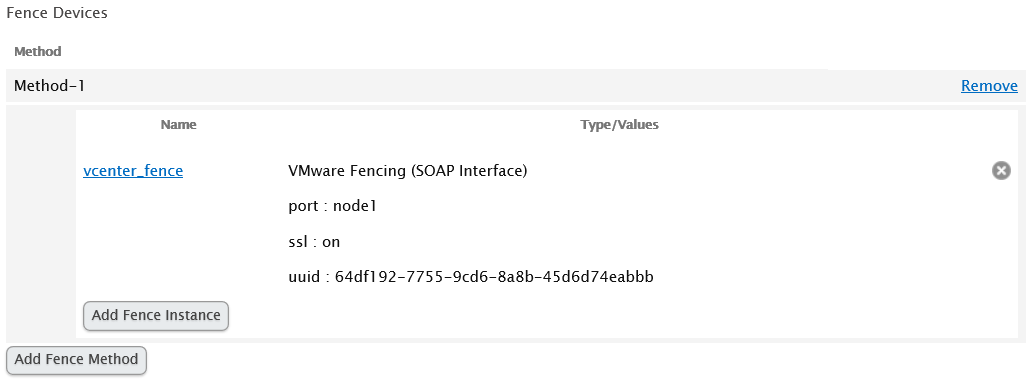
3、添加vCenter为fence设备
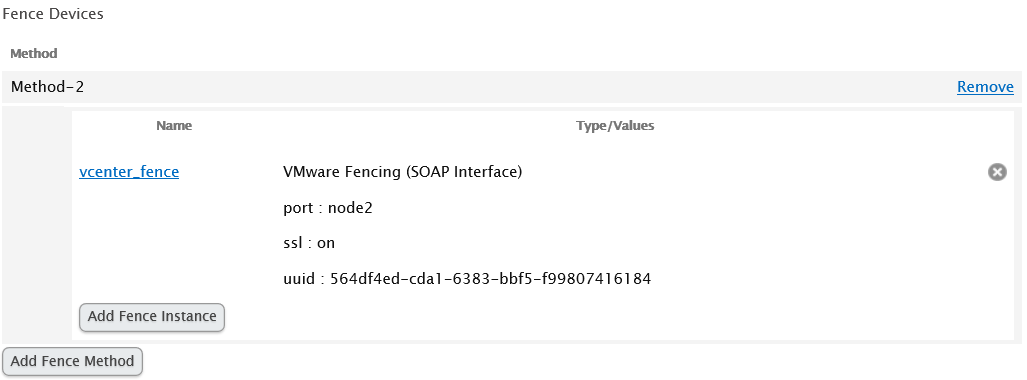
4、查找节点的虚拟机UUID
[[email protected] ~]# fence_vmware_soap -a 192.168.10.91 -z -l [email protected] -p [email protected] -o list
node1,564df192-7755-9cd6-8a8b-45d6d74eabbb
node2,564df4ed-cda1-6383-bbf5-f99807416184
5、两个节点添加fence方法和实例
6、查看fence设备状态
[[email protected] ~]# fence_vmware_soap -a 192.168.10.91 -z -l [email protected] -p [email protected] -o status
Status: ON
7、测试fence设备
[[email protected] ~]# fence_check
fence_check run at Tue May 23 09:41:30 CST 2017 pid: 3455
Testing node1.localdomain method 1: success
Testing node2.localdomain method 1: success
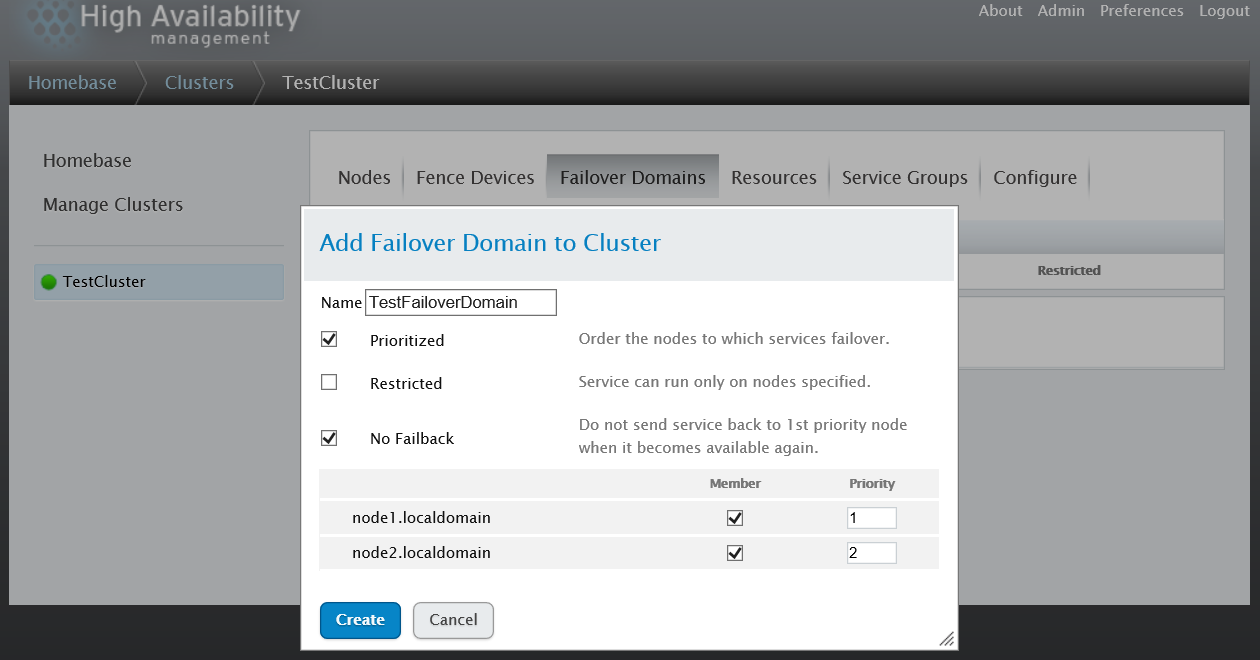
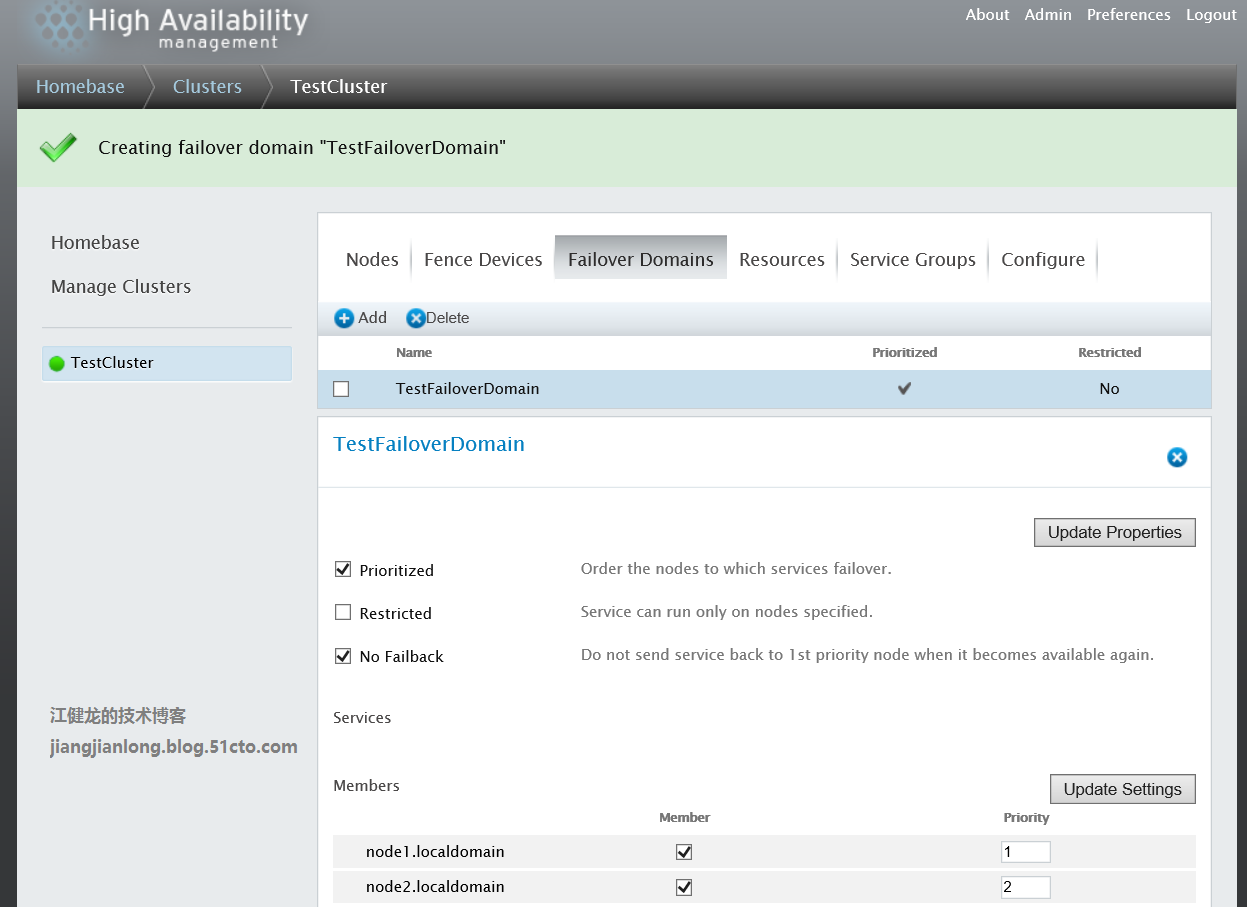
8、创建故障域
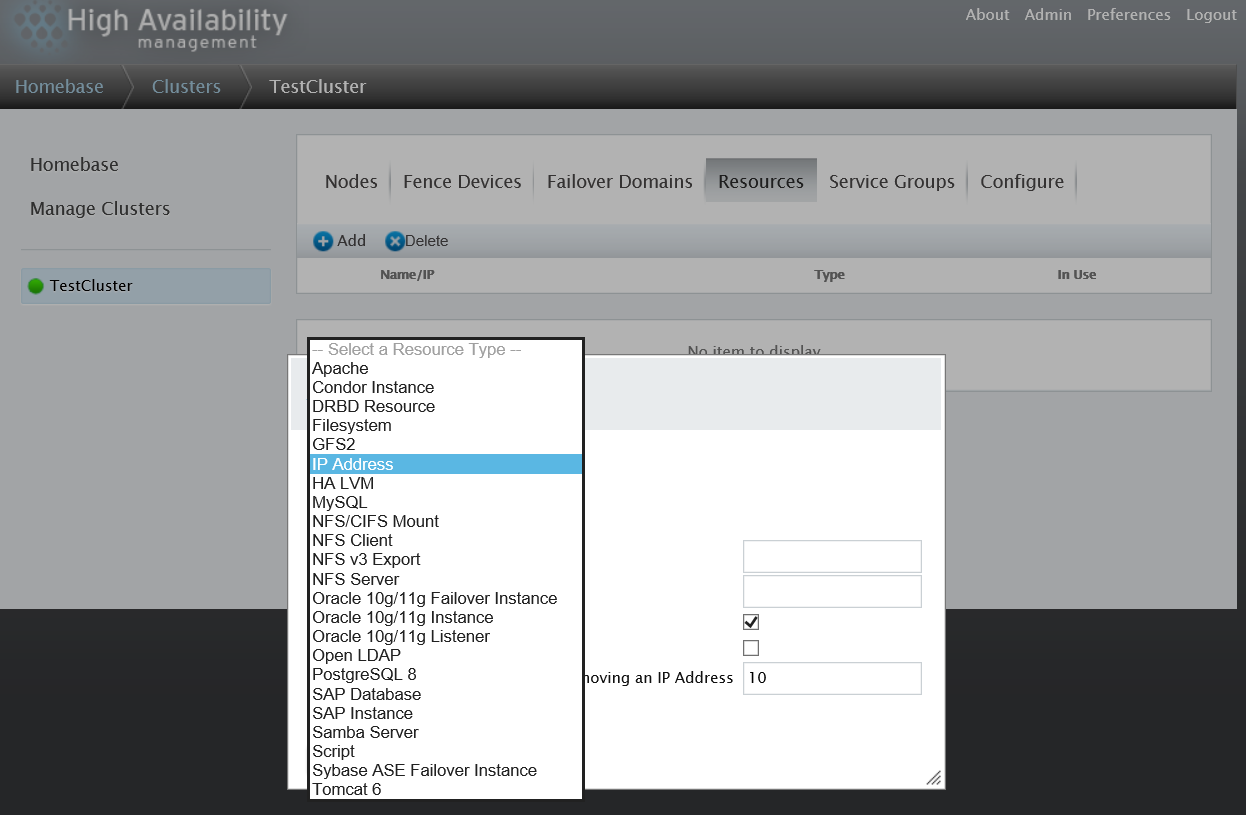
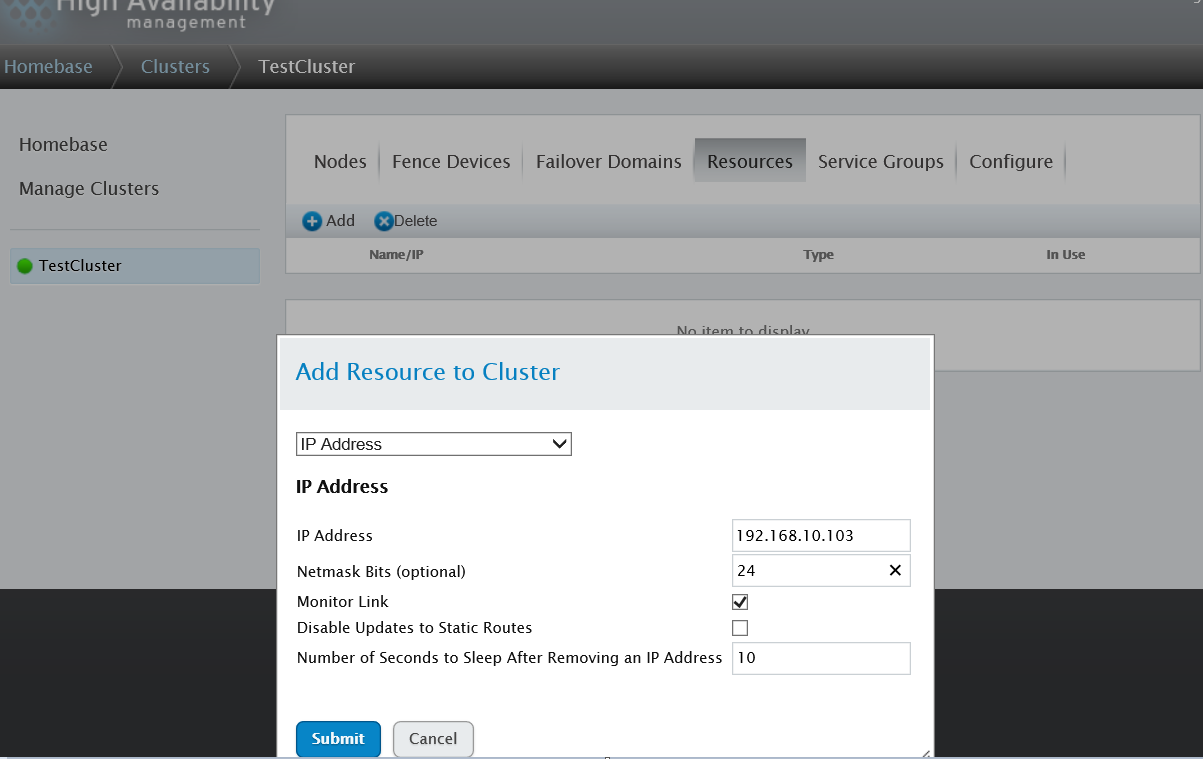
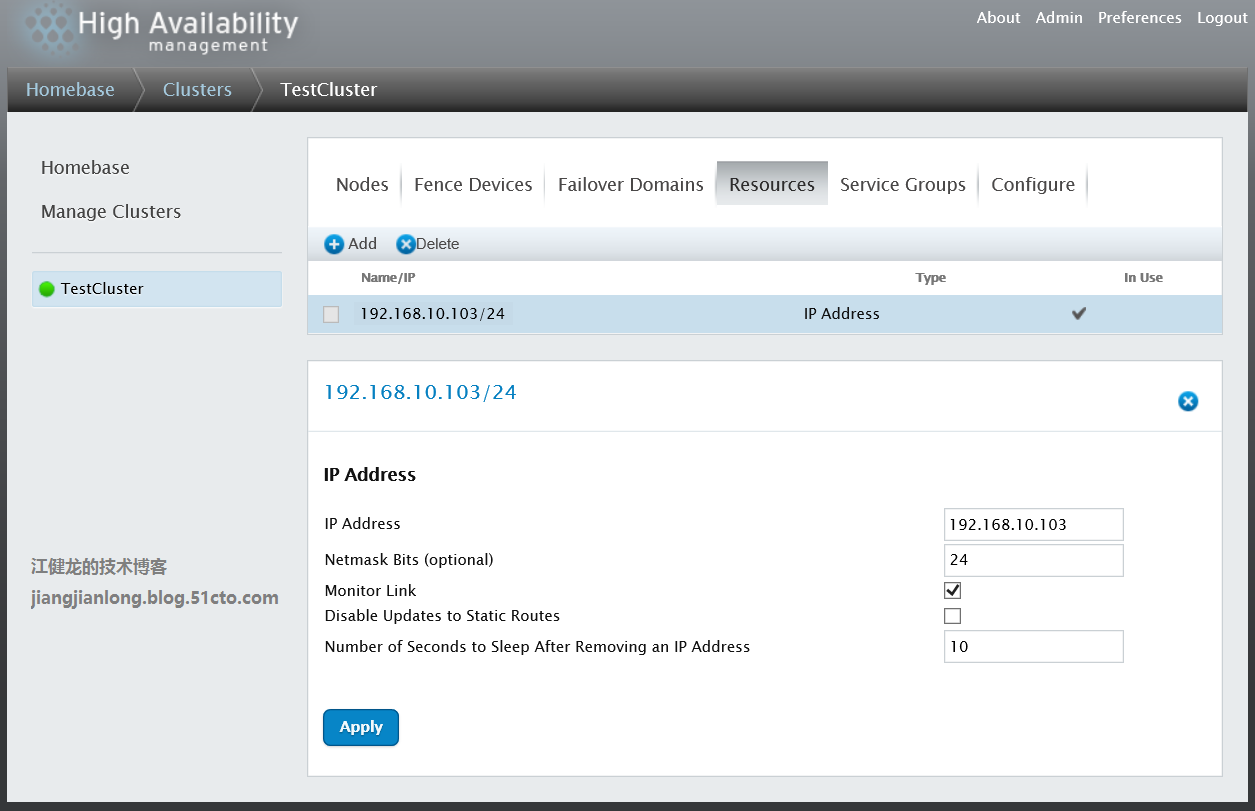
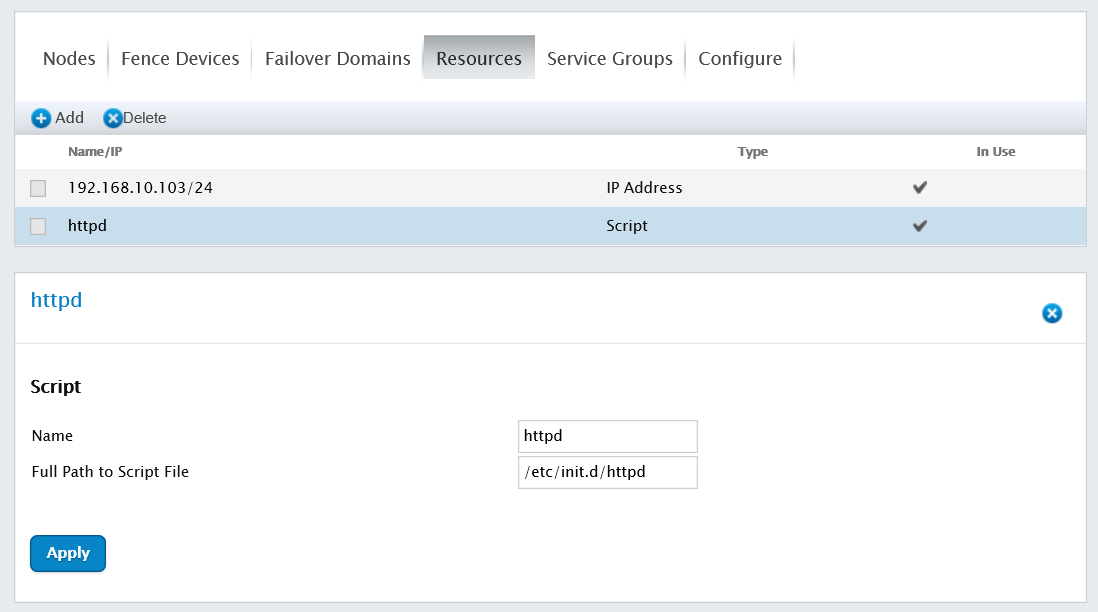
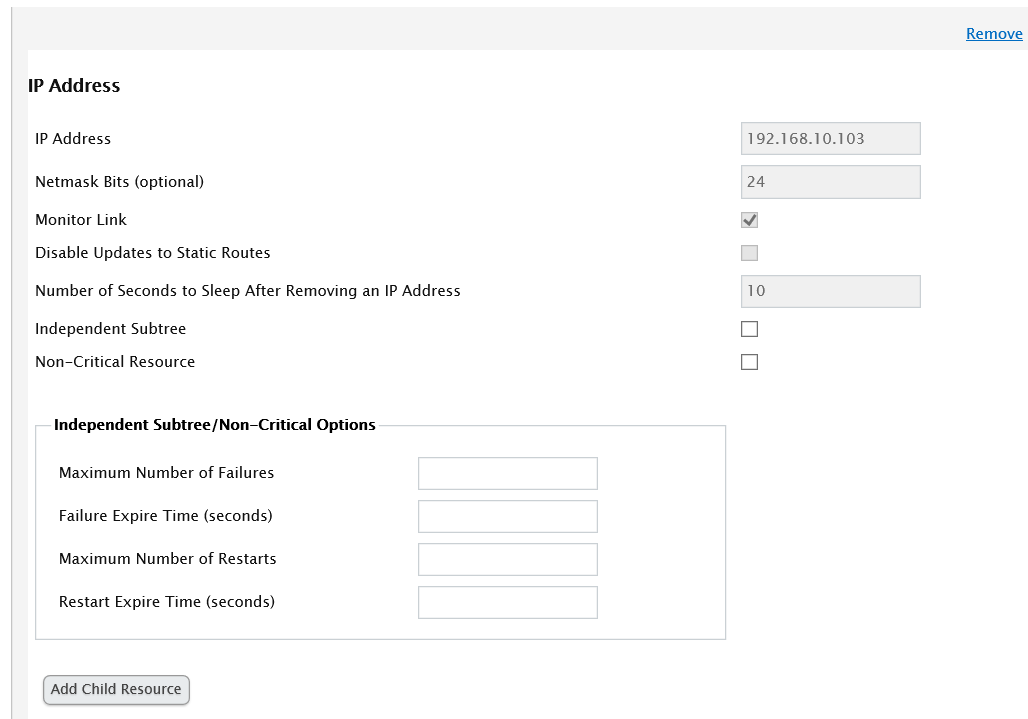
9、添加群集资源,分别添加IP地址和脚本为群集资源
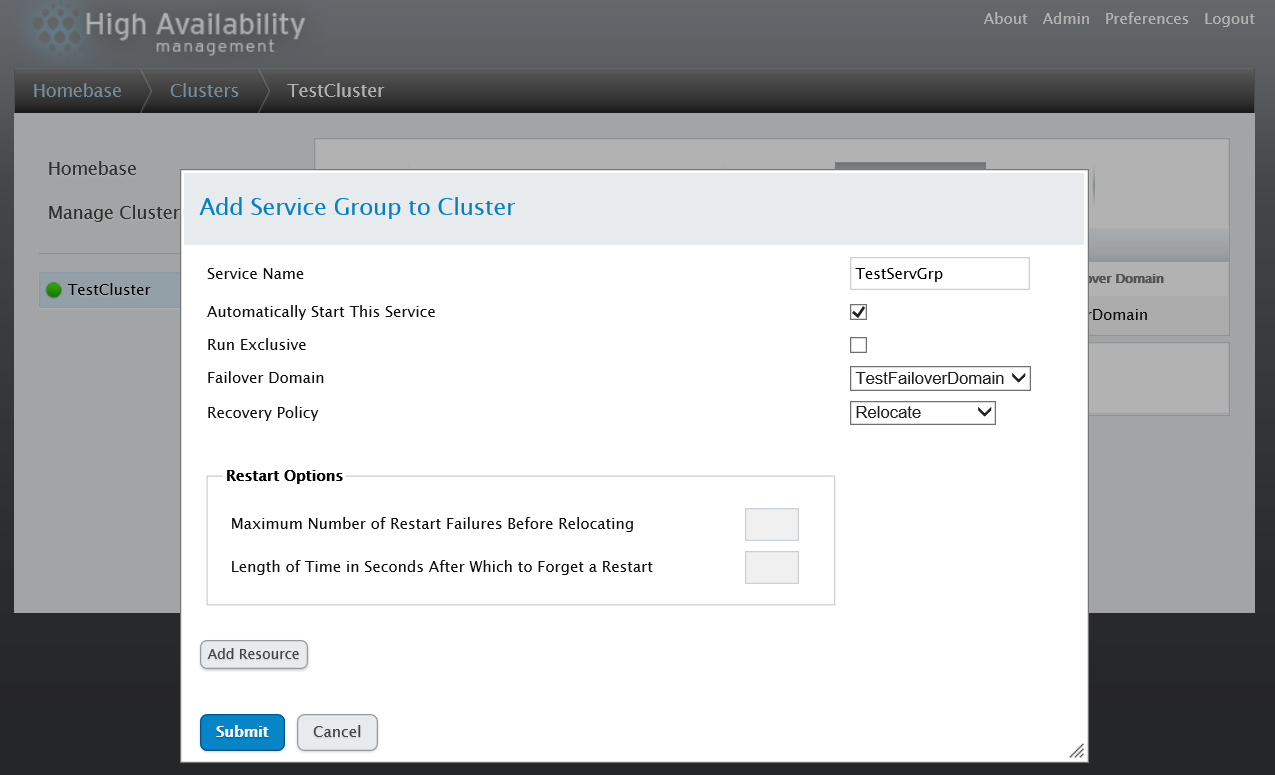
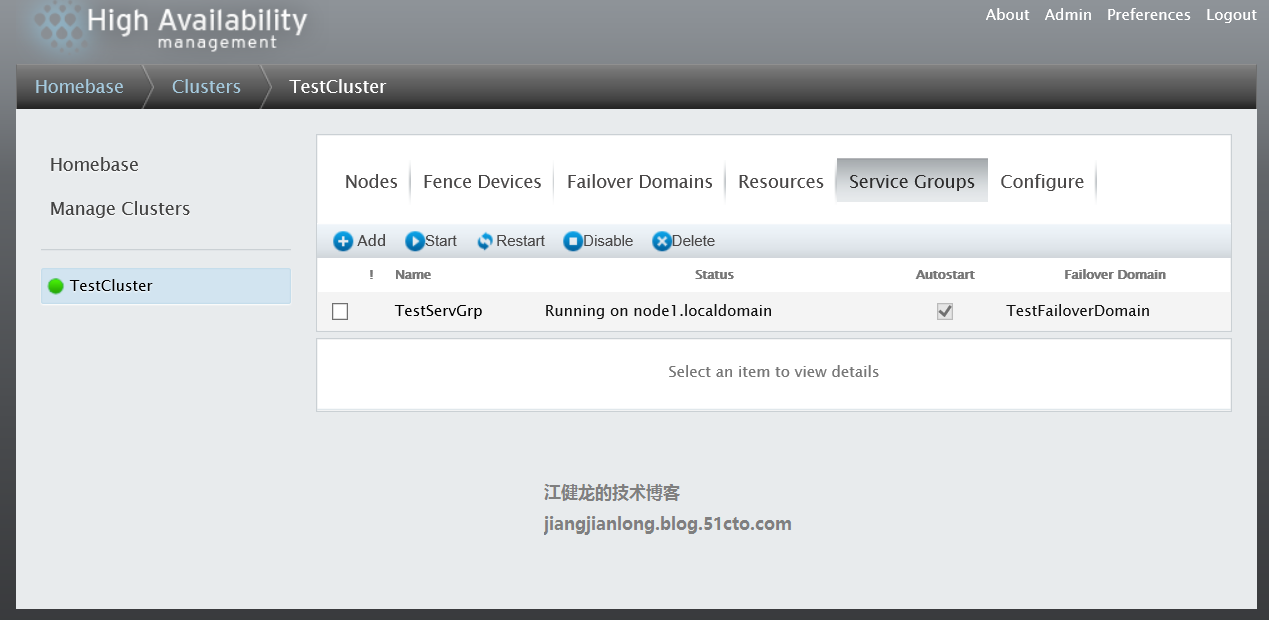
10、创建群集服务组并添加已有的资源
11、配置仲裁盘,在HAmanager服务器安装iSCSI target服务并创建一块100M的共享磁盘给两个节点
[[email protected] ~]#yum install scsi-target-utils -y
[[email protected] ~]#dd if=/dev/zero of=/iSCSIdisk/100m.img bs=1M seek=100 count=0
[[email protected] ~]#vi /etc/tgt/targets.conf
<target iqn.2016-08.disk.rh6:disk100m>
backing-store /iSCSIdisk/100m.img
initiator-address 192.168.10.104 #for node1
initiator-address 192.168.10.105 #for node2
</target>
[[email protected] ~]#service tgtd start
[[email protected] ~]#chkconfig tgtd on
[[email protected] ~]#tgt-admin –show
Target 1: iqn.2016-08.disk.rh6:disk100m
System information:
Driver: iscsi
State: ready
I_T nexus information:
LUN information:
LUN: 0
Type: controller
SCSI ID: IET 00010000
SCSI SN: beaf10
Size: 0 MB, Block size: 1
Online: Yes
Removable media: No
Prevent removal: No
Readonly: No
Backing store type: null
Backing store path: None
Backing store flags:
LUN: 1
Type: disk
SCSI ID: IET 00010001
SCSI SN: beaf11
Size: 105 MB, Block size: 512
Online: Yes
Removable media: No
Prevent removal: No
Readonly: No
Backing store type: rdwr
Backing store path: /sharedisk/100m.img
Backing store flags:
Account information:
ACL information:
192.168.10.104
192.168.10.105
[[email protected] ~]#
12、两个节点安装iscsi-initiator-utils并登录iscsi目标
[[email protected] ~]# yum install iscsi-initiator-utils
[[email protected] ~]# chkconfig iscsid on
[[email protected] ~]# iscsiadm -m discovery -t sendtargets -p 192.168.10.150
[[email protected] ~]# iscsiadm -m node
[[email protected] ~]# iscsiadm -m node -T iqn.2016-08.disk.rh6:disk100m --login
[[email protected] ~]# yum install iscsi-initiator-utils
[[email protected] ~]# chkconfig iscsid on
[[email protected] ~]# iscsiadm -m discovery -t sendtargets -p 192.168.10.150
[[email protected] ~]# iscsiadm -m node
[[email protected] ~]# iscsiadm -m node -T iqn.2016-08.disk.rh6:disk100m --login
13、在节点一将共享磁盘/dev/sdb创建分区sdb1
[[email protected] ~]# fdisk /dev/sdb
然后创建成sdb1
[[email protected] ~]# partprobe /dev/sdb1
14、在节点一将sdb1创建成仲裁盘
[[email protected] ~]# mkqdisk -c /dev/sdb1 -l testqdisk
mkqdisk v3.0.12.1
Writing new quorum disk label ‘testqdisk‘ to /dev/sdb1.
WARNING: About to destroy all data on /dev/sdb1; proceed [N/y] ? y
Initializing status block for node 1...
Initializing status block for node 2...
Initializing status block for node 3...
Initializing status block for node 4...
Initializing status block for node 5...
Initializing status block for node 6...
Initializing status block for node 7...
Initializing status block for node 8...
Initializing status block for node 9...
Initializing status block for node 10...
Initializing status block for node 11...
Initializing status block for node 12...
Initializing status block for node 13...
Initializing status block for node 14...
Initializing status block for node 15...
Initializing status block for node 16...
[[email protected] ~]#
[[email protected] ~]# mkqdisk -L
mkqdisk v3.0.12.1
/dev/block/8:17:
/dev/disk/by-id/scsi-1IET_00010001-part1:
/dev/disk/by-path/ip-192.168.10.150:3260-iscsi-iqn.2016-08.disk.rh6:disk100m-lun-1-part1:
/dev/sdb1:
Magic: eb7a62c2
Label: testqdisk
Created: Mon May 22 22:52:01 2017
Host: node1.localdomain
Kernel Sector Size: 512
Recorded Sector Size: 512
[[email protected] ~]#
15、在节点二查看仲裁盘,也正常识别
[[email protected] ~]# partprobe /dev/sdb1
[[email protected] ~]# mkqdisk -L
mkqdisk v3.0.12.1
/dev/block/8:17:
/dev/disk/by-id/scsi-1IET_00010001-part1:
/dev/disk/by-path/ip-192.168.10.150:3260-iscsi-iqn.2016-08.disk.rh6:disk100m-lun-1-part1:
/dev/sdb1:
Magic: eb7a62c2
Label: testqdisk
Created: Mon May 22 22:52:01 2017
Host: node1.localdomain
Kernel Sector Size: 512
Recorded Sector Size: 512
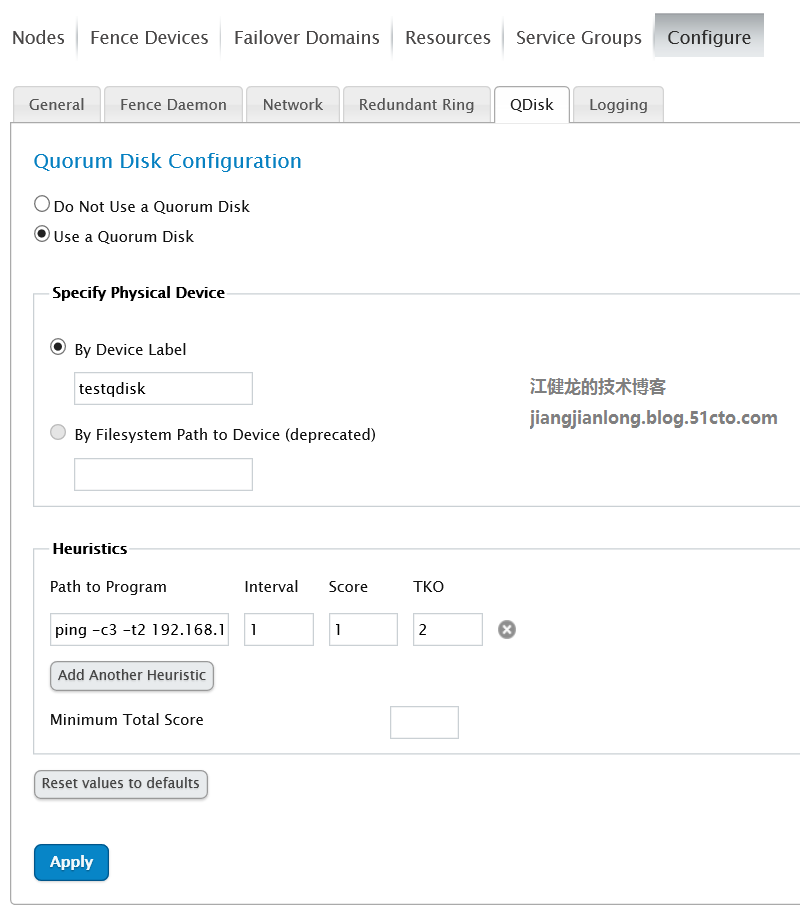
16、配置群集使用该仲裁盘
17、重启群集,使仲裁盘生效
[[email protected] ~]# ccs -h node1 --stopall
node1 password:
Stopped node2.localdomain
Stopped node1.localdomain
[[email protected] ~]# ccs -h node1 --startall
Started node2.localdomain
Started node1.localdomain
[[email protected] ~]#
18、查看群集状态
[[email protected] ~]# clustat
Cluster Status for TestCluster2 @ Mon May 22 23:48:27 2017
Member Status: Quorate
Member Name ID Status
------ ---- ---- ------
node1.localdomain 1 Online, Local, rgmanager
node2.localdomain 2 Online, rgmanager
/dev/block/8:17 0 Online, Quorum Disk
Service Name Owner (Last) State
------- ---- ----- ------ -----
service:TestServGrp node1.localdomain started
[[email protected] ~]#
19、查看群集节点状态
[[email protected] ~]# ccs_tool lsnode
Cluster name: icpl_cluster, config_version: 21
Nodename Votes Nodeid Fencetype
node1.localdomain 1 1 vcenter_fence
node2.localdomain 1 2 vcenter_fence
20、查看群集节点同步状态
[[email protected] ~]# ccs -h node1 --checkconf
All nodes in sync.
21、使用群集IP访问web服务
江健龙的技术博客http://jiangjianlong.blog.51cto.com/3735273/1931499
四、群集故障转移测试
1、关闭主节点,故障自动转移功能正常
[[email protected] ~]#poweroff
[r[email protected] ~]#tail–f /var/log/messages
May 23 10:29:26 node1 modclusterd: shutdown succeeded
May 23 10:29:26 node1 rgmanager[2125]: Shutting down
May 23 10:29:26 node1 rgmanager[2125]: Shutting down
May 23 10:29:26 node1 rgmanager[2125]:Stopping service service:TestServGrp
May 23 10:29:27 node1 rgmanager[2125]: [ip] Removing IPv4 address 192.168.10.103/24 from eth0
May 23 10:29:36 node1rgmanager[2125]: Service service:TestServGrp is stopped
May 23 10:29:36 node1 rgmanager[2125]: Disconnecting from CMAN
May 23 10:29:52 node1 rgmanager[2125]: Exiting
May 23 10:29:53 node1 ricci:shutdown succeeded
May 23 10:29:54 node1 oddjobd: oddjobd shutdown succeeded
May 23 10:29:54 node1 saslauthd[2315]:server_exit : master exited: 2315
[[email protected] ~]#tail–f /var/log/messages
May 23 10:29:45 node2 rgmanager[2130]: Member 1 shutting down
May 23 10:29:45 node2 rgmanager[2130]: Starting stopped service service:TestServGrp
May 23 10:29:45 node2 rgmanager[5688]: [ip] Adding IPv4 address 192.168.10.103/24 to eth0
May 23 10:29:49 node2 rgmanager[2130]: Service service:TestServGrp started
May 23 10:30:06 node2 qdiskd[1480]: Node 1 shutdown
May 23 10:30:06 node2 corosync[1437]: [QUORUM Members[1]: 2
May 23 10:30:06 node2 corosync[1437]: [TOTEM ] A processor joined or left the membership
and a new membership was formed.
May 23 10:30:06 node2 corosync[1437]: [CPG ] chosen downlist: sender r(0) ip (192.168.10.105) :
members(old:2 left:1)
May 23 10:30:06 node2 corosync[1437]: [MAIN ] Completed service synchronization, ready to
provide service
May 23 10:30:06 node2 kernel: dlm: closing connection to node 1
May 23 10:30:06 node2 qdiskd[1480]: Assuming master role
[[email protected] ~]# clustat
Cluster Status for TestCluster2 @ Mon May 22 23:48:27 2017
Member Status: Quorate
Member Name ID Status
------ ---- ---- ------
node1.localdomain 1 Online, Local, rgmanager
node2.localdomain 2 Online, rgmanager
/dev/block/8:17 0 Online, Quorum Disk
Service Name Owner (Last) State
------- ---- ----- ------ -----
service:TestServGrp node2.localdomain started
[[email protected] ~]#
2、停掉主节点应用服务,故障自动转移功能正常
[[email protected] ~]# /etc/init.d/httpd stop
[[email protected] ~]#tail–f /var/log/messages
May 23 11:14:02 node2 rgmanager[11264]: [script] Executing /etc/init.d/httpd status
May 23 11:14:02 node2 rgmanager[11289]: [script] script:icpl: status of /etc/init.d/httpd failed (returned 3)
May 23 11:14:02 node2 rgmanager[2127]: status on script "httpd" returned 1 (generic error)
May 23 11:14:02 node2 rgmanager[2127]: Stopping service service:TestServGrp
May 23 11:14:03 node2 rgmanager[11320]: [script] Executing /etc/init.d/httpd stop
May 23 11:14:03 node2 rgmanager[11384]: [ip] Removing IPv4 address 192.168.10.103/24 from eth0
May 23 11:14:08 node2 ricci[11416]: Executing ‘/usr/bin/virsh nodeinfo‘
May 23 11:14:08 node2 ricci[11418]: Executing ‘/usr/libexec/ricci/ricci-worker -f /var/lib/ricci/queue/2116732044‘
May 23 11:14:09 node2 ricci[11422]: Executing ‘/usr/libexec/ricci/ricci-worker -f /var/lib/ricci/queue/1193918332‘
May 23 11:14:13 node2 rgmanager[2127]: Service service:TestServGrp is recovering
May 23 11:14:17 node2 rgmanager[2127]: Service service:TestServGrp is now running on member 1
[[email protected] ~]#tail–f /var/log/messages
May 23 11:14:20 node1 rgmanager[2130]: Recovering failed service service:TestServGrp
May 23 11:14:20 node1 rgmanager[13006]: [ip] Adding IPv4 address 192.168.10.103/24 to eth0
May 23 11:14:24 node1 rgmanager[13092]: [script] Executing /etc/init.d/httpd start
May 23 11:14:24 node1 rgmanager[2130]: Service service:TestServGrp started
May 23 11:14:58 node1 rgmanager[13280]: [script] Executing /etc/init.d/httpd status
[[email protected] ~]# clustat
Cluster Status for TestCluster2 @ Mon May 22 23:48:27 2017
Member Status: Quorate
Member Name ID Status
------ ---- ---- ------
node1.localdomain 1 Online, Local, rgmanager
node2.localdomain 2 Online, rgmanager
/dev/block/8:17 0 Online, Quorum Disk
Service Name Owner (Last) State
------- ---- ----- ------ -----
service:TestServGrp node1.localdomain started
[[email protected] ~]#
3、停掉主节点网络服务,故障自动转移功能正常
[[email protected] ~]#service network stop
[[email protected] ~]#tail–f /var/log/messages
May 23 22:11:16 node2 qdiskd[1480]: Assuming master role
May 23 22:11:17 node2 qdiskd[1480]: Writing eviction notice for node 1
May 23 22:11:17 node2 corosync[1437]: [TOTEM ] A processor failed, forming new configuration.
May 23 22:11:18 node2 qdiskd[1480]: Node 1 evicted
May 23 22:11:19 node2 corosync[1437]: [QUORUM] Members[1]: 2
May 23 22:11:19 node2 corosync[1437]: [TOTEM ] A processor joined or left the membership and a new membership was formed.
May 23 22:11:19 node2 corosync[1437]: [CPG ] chosen downlist: sender r(0) ip(192.168.10.105) ; members(old:2 left:1)
May 23 22:11:19 node2 corosync[1437]: [MAIN ] Completed service synchronization, ready to provide service.
May 23 22:11:19 node2 kernel: dlm: closing connection to node 1
May 23 22:11:19 node2 rgmanager[2131]: State change: node1.localdomain DOWN
May 23 22:11:19 node2 fenced[1652]: fencing node1.localdomain
May 23 22:11:58 node2 fenced[1652]: fence node1.localdomain success
May 23 22:11:59 node2 rgmanager[2131]: Taking over service service:TestServGrp from down member node1.localdomain
May 23 22:11:59 node2 rgmanager[6145]: [ip] Adding IPv4 address 192.168.10.103/24 to eth0
May 23 22:12:03 node2 rgmanager[6234]: [script] Executing /etc/init.d/httpd start
May 23 22:12:03 node2 rgmanager[2131]: Service service:TestServGrp started
May 23 22:12:35 node2 corosync[1437]: [TOTEM ] A processor joined or left the membership and a new membership was formed.
May 23 22:12:35 node2 corosync[1437]: [QUORUM] Members[2]: 1 2
May 23 22:12:35 node2 corosync[1437]: [QUORUM] Members[2]: 1 2
May 23 22:12:35 node2 corosync[1437]: [CPG ] chosen downlist: sender r(0) ip(192.168.10.105) ; members(old:1 left:0)
May 23 22:12:35 node2 corosync[1437]: [MAIN ] Completed service synchronization, ready to provide service.
May 23 22:12:41 node2 rgmanager[6425]: [script] Executing /etc/init.d/httpd status
May 23 22:12:43 node2 qdiskd[1480]: Node 1 shutdown
May 23 22:12:55 node2 kernel: dlm: got connection from 1
May 23 22:13:08 node2 rgmanager[2131]: State change: node1.localdomain UP
[[email protected] ~]# clustat
Cluster Status for TestCluster2 @ Mon May 22 23:48:27 2017
Member Status: Quorate
Member Name ID Status
------ ---- ---- ------
node1.localdomain 1 Online, Local, rgmanager
node2.localdomain 2 Online, rgmanager
/dev/block/8:17 0 Online, Quorum Disk
Service Name Owner (Last) State
------- ---- ----- ------ -----
service:TestServGrp node2.localdomain started
[[email protected] ~]#
附:RHCS名词解释
1 分布式集群管理器(CMAN,Cluster Manager)
管理集群成员,了解成员之间的运行状态。
2 分布式锁管理器(DLM,Distributed Lock Manager)
每一个节点都运行了一个后台进程DLM,当用记操作一个元数据时,会通知其它节点,只能读取这个元数据。
3 配置文件管理(CCS,Cluster Configuration System)
主要用于集群配置文件管理,用于配置文件的同步。每个节点运行了CSS后台进程。当发现配置文件(/etc/cluster/cluster.conf)变化后,马上将此变化传播到其它节点上去。
4.fence设备(fence)
工作原理:当主机异常,务机会调用fence设备,然后将异常主机重启,当fence设备操作成功后,返回信息给备机,备机接到fence设备的消息后,接管主机的服务和资源。
5、Conga集群管理软件:
Conga由两部分组成:luci和ricci,luci是跑在集群管理服务器上的服务,而ricci则是跑在各集群节点上的服务,luci也可以装在节点上。集群的管理和配置由这两个服务进行通信,可以使用Conga的web界面来管理RHCS集群。
6、高可用性服务管理(rgmanager)
提供节点服务监控和服务故障转移功能,当一个节点服务出现故障时,将服务转移到另一个健康节点。
本文出自 “江健龙的技术博客” 博客,请务必保留此出处http://jiangjianlong.blog.51cto.com/3735273/1931499
用hpmc/sg做群集,ha和rac有啥不同?
如题:还有单机单链路和双机双链路是什么意思?希望大虾介绍的详细点....谢谢额~~大概是以下个意思:HA(即使用MC/SG做双机控制):磁阵是以共享磁盘的方式连接到两台机子上的。在使用中,磁阵只受一台机子控制;双机... 查看详情
vmware之ha群集
...移其它ESXI主机上运行,满足此功能,必须要相同的网络配置(如分布式网络)和共享存储实施群集步骤1、新建群集2、把各ESXI主机添加拖动到新的群集中关于ESXI5.5.上警告通知,解决方法:在ESXi5.0中,增加DataStoreHeartBeat功能,... 查看详情
keepalived双机热备
...,保证用户的正常访问。两台从调度器,添加两块网卡,配置从调度器和主调度器方法一样,但是在配置keepalived的时候从服务器优先级要设置的比主的低,主服务器修改成为MASTE 查看详情
ha群集配置
heartbeat主机配置第一步关闭防火墙及selinuxiptables-Fserviceiptablessavevim/etc/selinux/configreboot添加host文件内容vim/etc/hosts192.168.238.132linux-server192.168.238.133linux-client下载扩展源安装包wgetwww.lishiming.net/data/at 查看详情
redhat6.4搭建rhcs集群
架构拓扑(图片摘自网络)650)this.width=650;"src="https://s5.51cto.com/wyfs02/M02/9D/A7/wKioL1mDPK-wt7NSAACrmTgZEAo075.png-wh_500x0-wm_3-wmp_4-s_553012873.png"title="RHCS架构图.png"alt="wKioL1mDPK-wt7NSAACrmTgZEAo075 查看详情
ha高可用集群部署(ricci+luci+fence)双机热备
主机环境redhat6.56位实验环境服务端1ip172.25.29.1 主机名:server1.example.com ricci 服务端2ip172.25.29.2 主机名:server2.example.com ricci 管 查看详情
基于lvs负载均衡群集来实现keepalived的部署技术(代码片段)
...基于Web服务的双机热备4.3、环境(基于LVS-DR进行搭建)4.4、配置主调度器(192.168.100.10)4.5、配置从调度器(192.168.100.40 查看详情
aix下配置双机ha和创建vg,两者有先后顺序吗
...建VG,然后自主机上export,在备机上import;也可以先将双机配置好,最后在配置资源组时再配置VG参考技术A在主节点创建VG,然后做export,然后在备节点做import即可。 参考技术B建议还是先创建完VG并在主备机上均正确识别出来以后... 查看详情
junipersrx100b双机热备ha心得
配置SRX100b双机热备HA心得:厂商指定F0/0/7-控制接口,F0/0/6-设备管理接口1、配置Clusterid和Nodeidsetchassisclustercluster-id1node0rebootsetchassisclustercluster-id1node1reboot注:node越小,级别越高,为主设备。另外,需要先把接口删除,否则重启... 查看详情
keepalived双机热备(代码片段)
...移地址,群集地址),但优先级不同。2、Keepalived的安装配置:1、编译安装:需安装ipvsadm全局设置:global_defsRouter_id服务器名称热备设置:vrrp_instancestate状 查看详情
ansible-playbook自动化安装keepalived实现nginx服务双机热备自动化配置
脚本实现通过ansible-playbook自动化安装Keepalived和配置,主要解决问题如下:Keepalived自动化安装;keepalived_vrid配置,自动根据vip获取最后一段作为vrid,确保同一网段不会出现vrid冲突导致HA切换失败的问题;自动配置Keepalived;HA检... 查看详情
keepalived双机热备(代码片段)
...移地址,群集地址),但优先级不同。2、Keepalived的安装配置:1、编译安装:需安装ipvsadm全局设置:global_defsRouter_id服务器名称热备设置:vrrp_instan 查看详情
haproxy+keepalived群集
...备。1、首先准备两台nginx服务器,开启nginx服务。在本地配置地址分别使用192.168.1.10和192.168.1.20,并配置虚拟地址lo:0-192.168.1.111用以作为群集标记。另一台nginx服务器配置相同。2、【 查看详情
vmwarevcenter群集ha警告2018-06-08
...后确认网络通信没问题,接下来分别在两台主机右键重新配置HA,HA警告消除。 查看详情
ha集群配置
一、什么是HA集群? HA即(highavailable)高可用,又叫做双机热备,用于关键性业务,简单理解就是,有两台机器A和B,正常提供服务的是A机器,B机器待命,当A机器停止服务后,会切换到B机器继续提供服务.常用实现高可用的开源软件有heartbe... 查看详情
lvs负载均衡群集
...续性,达到高可用(HA)的容错效果。例如:故障切断、双机热备、多 查看详情
关于ha(双机冗余接口)
HA是双机接口,即说明这款防火墙支持双机冗余并行运行模式,可以用同型号的两台机器同时接上联和下联线路,并用线路将两台机器的HA口连接起来,达到协同工作,并行运行的功能。高可用性H.A.(HighAvailability)指的是通过尽... 查看详情
ha-集群(highavailable)高可用性集群(双机热备)菜鸟入门级
...换到主机上运行,数据一致性通过共享存储系统解决。2.实现该功能的软件有:Heartbeat , keepalived(具有负载均衡的能力)3.结构图&n 查看详情


