关键词:
转载请注明出处:http://blog.csdn.net/hejjunlin/article/details/51159419
如何优化你的布局层级结构之RelativeLayout和LinearLayout及FrameLayout性能分析
工作一段时间后,经常会被领导说,你这个进入速度太慢了,竞品的进入速度很快,你搞下优化吧?每当这时,你会怎么办?功能实现都有啊,进入时要加载那么多view,这也没办法啊,等等。
先看一些现象吧:用Android studio,新建一个Activity自动生成的布局文件都是RelativeLayout,或许你会认为这是IDE的默认设置问题,其实不然,这是由 android-sdk\tools\templates\activities\EmptyActivity\root\res\layout\activity_simple.xml.ftl 这个文件事先就定好了的,也就是说这是Google的选择,而非IDE的选择。那SDK为什么会默认给开发者新建一个默认的RelativeLayout布局呢?当然是因为RelativeLayout的性能更优,性能至上嘛。但是我们再看看默认新建的这个RelativeLayout的父容器,也就是当前窗口的顶级View——DecorView,它却是个垂直方向的LinearLayout,上面是标题栏,下面是内容栏。那么问题来了,Google为什么给开发者默认新建了个RelativeLayout,而自己却偷偷用了个LinearLayout,到底谁的性能更高,开发者该怎么选择呢?
View的一些基本工作原理
先通过几个问题,简单的了解写android中View的工作原理吧。
View是什么?
简单来说,View是Android系统在屏幕上的视觉呈现,也就是说你在手机屏幕上看到的东西都是View。
View是怎么绘制出来的?
View的绘制流程是从ViewRoot的performTraversals()方法开始,依次经过measure(),layout()和draw()三个过程才最终将一个View绘制出来。
View是怎么呈现在界面上的?
Android中的视图都是通过Window来呈现的,不管Activity、Dialog还是Toast它们都有一个Window,然后通过WindowManager来管理View。Window和顶级View——DecorView的通信是依赖ViewRoot完成的。
View和ViewGroup什么区别?
不管简单的Button和TextView还是复杂的RelativeLayout和ListView,他们的共同基类都是View。所以说,View是一种界面层控件的抽象,他代表了一个控件。那ViewGroup是什么东西,它可以被翻译成控件组,即一组View。ViewGroup也是继承View,这就意味着View本身可以是单个控件,也可以是多个控件组成的控件组。根据这个理论,Button显然是个View,而RelativeLayout不但是一个View还可以是一个ViewGroup,而ViewGroup内部是可以有子View的,这个子View同样也可能是ViewGroup,以此类推。
RelativeLayout和LinearLayout性能PK
基于以上原理和大背景,我们要探讨的性能问题,说的简单明了一点就是:当RelativeLayout和LinearLayout分别作为ViewGroup,表达相同布局时绘制在屏幕上时谁更快一点。上面已经简单说了View的绘制,从ViewRoot的performTraversals()方法开始依次调用perfromMeasure、performLayout和performDraw这三个方法。这三个方法分别完成顶级View的measure、layout和draw三大流程,其中perfromMeasure会调用measure,measure又会调用onMeasure,在onMeasure方法中则会对所有子元素进行measure,这个时候measure流程就从父容器传递到子元素中了,这样就完成了一次measure过程,接着子元素会重复父容器的measure,如此反复就完成了整个View树的遍历。同理,performLayout和performDraw也分别完成perfromMeasure类似的流程。通过这三大流程,分别遍历整棵View树,就实现了Measure,Layout,Draw这一过程,View就绘制出来了。那么我们就分别来追踪下RelativeLayout和LinearLayout这三大流程的执行耗时。
如下图,我们分别用两用种方式简单的实现布局测试下
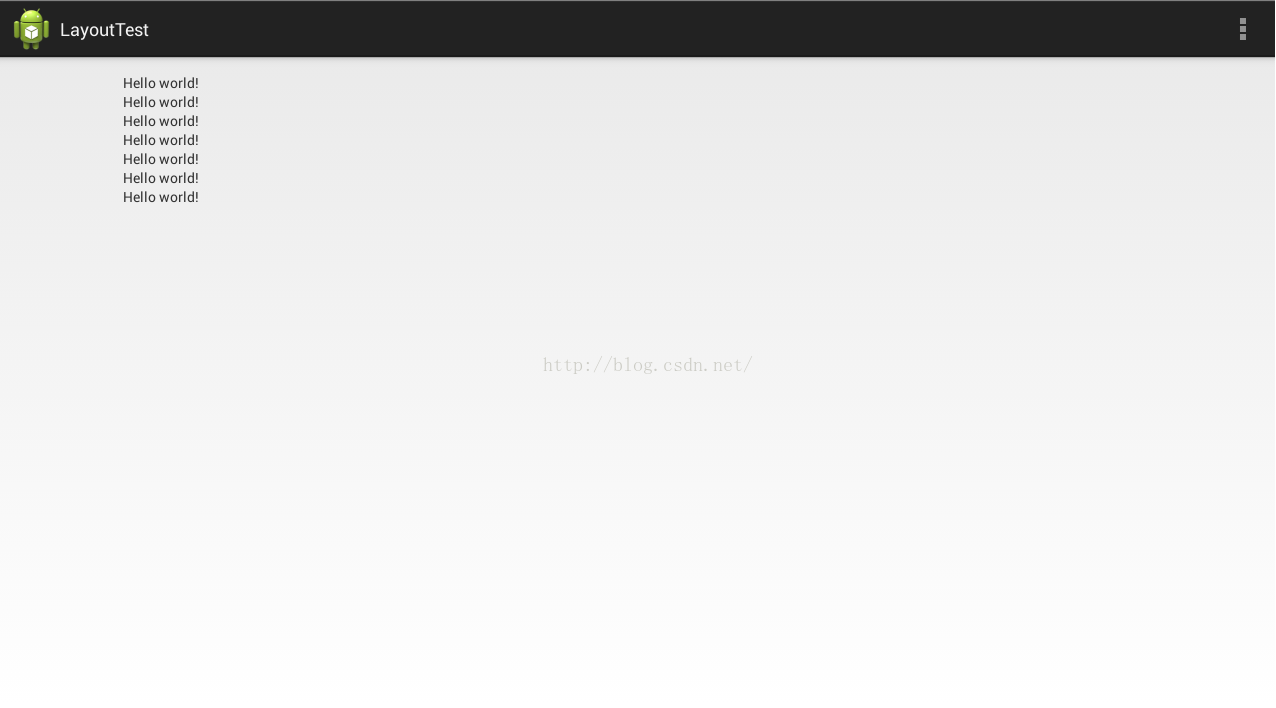
LinearLayout
Measure:0.762ms
Layout:0.167ms
draw:7.665ms
RelativeLayout
Measure:2.180ms
Layout:0.156ms
draw:7.694ms
从这个数据来看无论使用RelativeLayout还是LinearLayout,layout和draw的过程两者相差无几,考虑到误差的问题,几乎可以认为两者不分伯仲,关键是Measure的过程RelativeLayout却比LinearLayout慢了一大截。
Measure都干什么了
RelativeLayout的onMeasure()方法
 @Override
    protected void onMeasure(int widthMeasureSpec, int heightMeasureSpec) {
        if (mDirtyHierarchy) {
            mDirtyHierarchy = false;
            sortChildren();
        }

        int myWidth = -1;
        int myHeight = -1;

        int width = 0;
        int height = 0;

        final int widthMode = MeasureSpec.getMode(widthMeasureSpec);
        final int heightMode = MeasureSpec.getMode(heightMeasureSpec);
        final int widthSize = MeasureSpec.getSize(widthMeasureSpec);
        final int heightSize = MeasureSpec.getSize(heightMeasureSpec);

        // Record our dimensions if they are known;
        if (widthMode != MeasureSpec.UNSPECIFIED) {
            myWidth = widthSize;
        }

        if (heightMode != MeasureSpec.UNSPECIFIED) {
            myHeight = heightSize;
        }

        if (widthMode == MeasureSpec.EXACTLY) {
            width = myWidth;
        }

        if (heightMode == MeasureSpec.EXACTLY) {
            height = myHeight;
        }

        View ignore = null;
        int gravity = mGravity & Gravity.RELATIVE_HORIZONTAL_GRAVITY_MASK;
        final boolean horizontalGravity = gravity != Gravity.START && gravity != 0;
        gravity = mGravity & Gravity.VERTICAL_GRAVITY_MASK;
        final boolean verticalGravity = gravity != Gravity.TOP && gravity != 0;

        int left = Integer.MAX_VALUE;
        int top = Integer.MAX_VALUE;
        int right = Integer.MIN_VALUE;
        int bottom = Integer.MIN_VALUE;

        boolean offsetHorizontalAxis = false;
        boolean offsetVerticalAxis = false;

        if ((horizontalGravity || verticalGravity) && mIgnoreGravity != View.NO_ID) {
            ignore = findViewById(mIgnoreGravity);
        }

        final boolean isWrapContentWidth = widthMode != MeasureSpec.EXACTLY;
        final boolean isWrapContentHeight = heightMode != MeasureSpec.EXACTLY;

        // We need to know our size for doing the correct computation of children positioning in RTL
        // mode but there is no practical way to get it instead of running the code below.
        // So, instead of running the code twice, we just set the width to a "default display width"
        // before the computation and then, as a last pass, we will update their real position with
        // an offset equals to "DEFAULT_WIDTH - width".
        final int layoutDirection = getLayoutDirection();
        if (isLayoutRtl() && myWidth == -1) {
            myWidth = DEFAULT_WIDTH;
        }

        View[] views = mSortedHorizontalChildren;
        int count = views.length;

        for (int i = 0; i < count; i++) {
            View child = views[i];
            if (child.getVisibility() != GONE) {
                LayoutParams params = (LayoutParams) child.getLayoutParams();
                int[] rules = params.getRules(layoutDirection);

                applyHorizontalSizeRules(params, myWidth, rules);
                measureChildHorizontal(child, params, myWidth, myHeight);

                if (positionChildHorizontal(child, params, myWidth, isWrapContentWidth)) {
                    offsetHorizontalAxis = true;
                }
            }
        }

        views = mSortedVerticalChildren;
        count = views.length;
        final int targetSdkVersion = getContext().getApplicationInfo().targetSdkVersion;

        for (int i = 0; i < count; i++) {
            final View child = views[i];
            if (child.getVisibility() != GONE) {
                final LayoutParams params = (LayoutParams) child.getLayoutParams();

                applyVerticalSizeRules(params, myHeight, child.getBaseline());
                measureChild(child, params, myWidth, myHeight);
                if (positionChildVertical(child, params, myHeight, isWrapContentHeight)) {
                    offsetVerticalAxis = true;
                }

                if (isWrapContentWidth) {
                    if (isLayoutRtl()) {
                        if (targetSdkVersion < Build.VERSION_CODES.KITKAT) {
                            width = Math.max(width, myWidth - params.mLeft);
                        } else {
                            width = Math.max(width, myWidth - params.mLeft - params.leftMargin);
                        }
                    } else {
                        if (targetSdkVersion < Build.VERSION_CODES.KITKAT) {
                            width = Math.max(width, params.mRight);
                        } else {
                            width = Math.max(width, params.mRight + params.rightMargin);
                        }
                    }
                }

                if (isWrapContentHeight) {
                    if (targetSdkVersion < Build.VERSION_CODES.KITKAT) {
                        height = Math.max(height, params.mBottom);
                    } else {
                        height = Math.max(height, params.mBottom + params.bottomMargin);
                    }
                }

                if (child != ignore || verticalGravity) {
                    left = Math.min(left, params.mLeft - params.leftMargin);
                    top = Math.min(top, params.mTop - params.topMargin);
                }

                if (child != ignore || horizontalGravity) {
                    right = Math.max(right, params.mRight + params.rightMargin);
                    bottom = Math.max(bottom, params.mBottom + params.bottomMargin);
                }
            }
        }

        // Use the top-start-most laid out view as the baseline. RTL offsets are
        // applied later, so we can use the left-most edge as the starting edge.
        View baselineView = null;
        LayoutParams baselineParams = null;
        for (int i = 0; i < count; i++) {
            final View child = views[i];
            if (child.getVisibility() != GONE) {
                final LayoutParams childParams = (LayoutParams) child.getLayoutParams();
                if (baselineView == null || baselineParams == null
                        || compareLayoutPosition(childParams, baselineParams) < 0) {
                    baselineView = child;
                    baselineParams = childParams;
                }
            }
        }
        mBaselineView = baselineView;

        if (isWrapContentWidth) {
            // Width already has left padding in it since it was calculated by looking at
            // the right of each child view
            width += mPaddingRight;

            if (mLayoutParams != null && mLayoutParams.width >= 0) {
                width = Math.max(width, mLayoutParams.width);
            }

            width = Math.max(width, getSuggestedMinimumWidth());
            width = resolveSize(width, widthMeasureSpec);

            if (offsetHorizontalAxis) {
                for (int i = 0; i < count; i++) {
                    final View child = views[i];
                    if (child.getVisibility() != GONE) {
                        final LayoutParams params = (LayoutParams) child.getLayoutParams();
                        final int[] rules = params.getRules(layoutDirection);
                        if (rules[CENTER_IN_PARENT] != 0 || rules[CENTER_HORIZONTAL] != 0) {
                            centerHorizontal(child, params, width);
                        } else if (rules[ALIGN_PARENT_RIGHT] != 0) {
                            final int childWidth = child.getMeasuredWidth();
                            params.mLeft = width - mPaddingRight - childWidth;
                            params.mRight = params.mLeft + childWidth;
                        }
                    }
                }
            }
        }

        if (isWrapContentHeight) {
            // Height already has top padding in it since it was calculated by looking at
            // the bottom of each child view
            height += mPaddingBottom;

            if (mLayoutParams != null && mLayoutParams.height >= 0) {
                height = Math.max(height, mLayoutParams.height);
            }

            height = Math.max(height, getSuggestedMinimumHeight());
            height = resolveSize(height, heightMeasureSpec);

            if (offsetVerticalAxis) {
                for (int i = 0; i < count; i++) {
                    final View child = views[i];
                    if (child.getVisibility() != GONE) {
                        final LayoutParams params = (LayoutParams) child.getLayoutParams();
                        final int[] rules = params.getRules(layoutDirection);
                        if (rules[CENTER_IN_PARENT] != 0 || rules[CENTER_VERTICAL] != 0) {
                            centerVertical(child, params, height);
                        } else if (rules[ALIGN_PARENT_BOTTOM] != 0) {
                            final int childHeight = child.getMeasuredHeight();
                            params.mTop = height - mPaddingBottom - childHeight;
                            params.mBottom = params.mTop + childHeight;
                        }
                    }
                }
            }
        }

        if (horizontalGravity || verticalGravity) {
            final Rect selfBounds = mSelfBounds;
            selfBounds.set(mPaddingLeft, mPaddingTop, width - mPaddingRight,
                    height - mPaddingBottom);

            final Rect contentBounds = mContentBounds;
            Gravity.apply(mGravity, right - left, bottom - top, selfBounds, contentBounds,
                    layoutDirection);

            final int horizontalOffset = contentBounds.left - left;
            final int verticalOffset = contentBounds.top - top;
            if (horizontalOffset != 0 || verticalOffset != 0) {
                for (int i = 0; i < count; i++) {
                    final View child = views[i];
                    if (child.getVisibility() != GONE && child != ignore) {
                        final LayoutParams params = (LayoutParams) child.getLayoutParams();
                        if (horizontalGravity) {
                            params.mLeft += horizontalOffset;
                            params.mRight += horizontalOffset;
                        }
                        if (verticalGravity) {
                            params.mTop += verticalOffset;
                            params.mBottom += verticalOffset;
                        }
                    }
                }
            }
        }

        if (isLayoutRtl()) {
            final int offsetWidth = myWidth - width;
            for (int i = 0; i < count; i++) {
                final View child = views[i];
                if (child.getVisibility() != GONE) {
                    final LayoutParams params = (LayoutParams) child.getLayoutParams();
                    params.mLeft -= offsetWidth;
                    params.mRight -= offsetWidth;
                }
            }
        }

        setMeasuredDimension(width, height);
    }
androd性能优化之布局优化(代码片段)
Android的布局管理器本身就是个UI组件,所有的布局管理器都是ViewGroup的子类,而ViewGroup是View的子类,所以布局管理器可以当成普通的UI组件使用,也可以作为容器类使用,可以调用多个重载addView()向布局管理... 查看详情
app基本性能优化
布局优化避免OverDraw过渡绘制优化布局层级避免嵌套过多无用布局当我们在画布局的时候,如果能实现相同的功能,优先考虑相对布局,然后在考虑别的布局,不要用绝对布局。使用标签把复杂的界面需要抽取出... 查看详情
android性能优化-卡顿和布局优化(代码片段)
...要的一项了,用户感知极强,无论你的代码写的如何,用户也不知道,用户只能看 查看详情
app基本性能优化
布局优化避免OverDraw过渡绘制优化布局层级避免嵌套过多无用布局当我们在画布局的时候,如果能实现相同的功能,优先考虑相对布局,然后在考虑别的布局,不要用绝对布局。使用标签把复杂的界面需要抽取出... 查看详情
布局优化方法
...rLayout嵌套所产生布局树的层级。可以使用AS自带工具协助优化布局----HierarchyView,用法:打开需要获取view层级的那个界面,然后依次点击菜单Tools->Android->AndroidDeviceMonitor。2.2、merge标签merge标签是作为include标签的一种辅助扩... 查看详情
django工程目录结构优化(代码片段)
1.我看到这篇文章,写的不错,在此复制了一份,防止以后找不到! 感谢作者的翻译--->原文的链接:http://www.loonapp.com/blog/11/ 如果原文存在,请打开原文件阅读 偶然看到一份关于Django工程目录的文章,英文版版的,觉... 查看详情
过度绘制的解决
...况,但这很容易产生性能问题。怎么过度绘制打开开关和如何看,不介绍了就。1.写合理而高效的布局Android的布局可以通过xml来实现,这使得开发者布局时较为随意,只以实现功能为目的,忽略性能问题的累积效应。在开发设计... 查看详情
如何在qt4程序中优化布局结构(表格讲解,很清楚)
原文地址:http://blog.csdn.net/qter_wd007/archive/2010/03/13/5377882.aspx在迄今为止讲到每一个例子中,我们只是简单的把窗口部件放置到某个确定的布局中。但在某些情况下,由此形成的布局看起来可能还不是我们最想要的形式。在这些情... 查看详情
android布局优化
...适合的布局尽量减少嵌套的层数。使用工具检查嵌套层数如何减少布局的嵌套层数呢,一种是我们写代码的时候自行注意,还可以使用工具来检查布局的层数如果你是使用AS开发的话,你可以在AS工具栏中点击Tools–>... 查看详情
seo之html优化:让你的网站html代码更符合seo规范
...极利于SEO的,可以让你的网站获得更好的搜索引擎排名。如何制作一个标准的HTML网页,如何做HTML优化,本文将为你详细阐述。一直想写下SEO中关于HTML优化方面的的文章,总算空出这部分时间来了。其实,HTML优化应该是网站内... 查看详情
史上最全android性能优化方案解析
Android中的性能优分为以下几个方面:布局优化网络优化安装包优化内存优化卡顿优化启动优化……一.布局优化布局优化的本质就是减少View的层级。常见的布局优化方案如下:在LinearLayout和RelativeLayout都可以完成布局的情... 查看详情
史上最全android性能优化方案解析
Android中的性能优分为以下几个方面:布局优化网络优化安装包优化内存优化卡顿优化启动优化……一.布局优化布局优化的本质就是减少View的层级。常见的布局优化方案如下:在LinearLayout和RelativeLayout都可以完成布局的情... 查看详情
unity3dugui之布局组件
1概述布局组件主要有:水平布局(HorizontalLayoutGroup)、垂直布局(VerticalLayoutGroup)、网格布局(GridLayoutGroup),用于约束子控件的布局方式,这些布局都有以下共同属性:Padding:边距,父控件向内收缩的空间,子控件只能在... 查看详情
优化1--布局的优化
1,减少布局的嵌套使用。删除无用的控件可层级。 有选择的使用ViewGroup,比如RelativeLayout,在布局中如果可以使用LinearLayout则尽量选择LineaLayout布局,如果可以使用FrameLayout则尽量使用FrameLayout则尽量使用帧布... 查看详情
如何使用androidsdktools
关键是了解每个工具的用途,具体的用法,到时候用到的再慢慢学!Android模拟器(AndroidEmulator)它是在你的计算机上运行的一个虚拟移动设备。你可以使用模拟器来在一个实际的Android运行环境下设计,调试和测试你的应用程序... 查看详情
seo之网站内部结构优化
如何优化网站的内部结构?网站内部结构优化是网站SEO过程中不可缺少的环节,在网站建设的初期就要做好设置工作。网站内部结构的优化主要包括:网站结构、页面元素、后期优化等,下面就从这几个方面为大家讲解,希望能... 查看详情
智能优化算法之灰狼优化算法(gwo)的实现(python附源码)(代码片段)
文章目录一、灰狼优化算法的实现思路1、社会等级结构分级2、包围猎物3、攻击猎物4、搜索猎物二、算法步骤三、实例一、灰狼优化算法的实现思路灰狼优化算法(GreyWolfOptimizer,简称GWO)是由SeyedaliMirjalili等人于2014... 查看详情
性能优化之布局优化(代码片段)
谈到性能优化,一般都是从优化布局开始,优化布局一般可采用如下步骤进行:Step1:进入系统设置打开调试GPU过度绘制功能,先定位存在重绘的布局;Step2:对已定位存在过度重绘的布局,采用lint功能检测... 查看详情